Why Lightroom’s New Web Gallery Feature Rocks!
Hi gang, and happy Monday. You already know about how to share a Collection on the Web with anybody (I covered that about two weeks ago), but you can go way beyond just sharing a collection and use the Gallery feature to tell a story, complete with text, large cover image, and more. Here’s how:
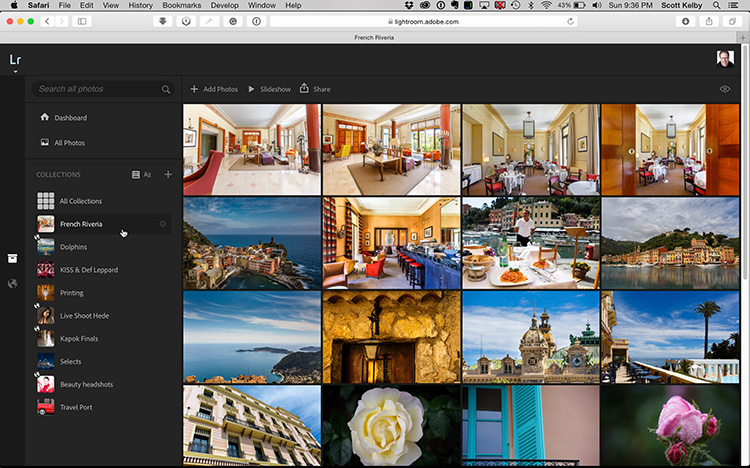
STEP ONE: Start by syncing any Collection to Lightroom Mobile (here’s how to do that if you’re not sure how). Then go under Lightroom’s Help menu and choose “View my Collections on The Web” and it launches your Web Browser and takes you to your synced collections (as shown here — you can see my synced collection in the list on the left side panel. Here I clicked on the “French Riveria” collection. All your collections are private until you choose one to share one, so click on a Collection and then click the ‘Share’ button right above your thumbnails.
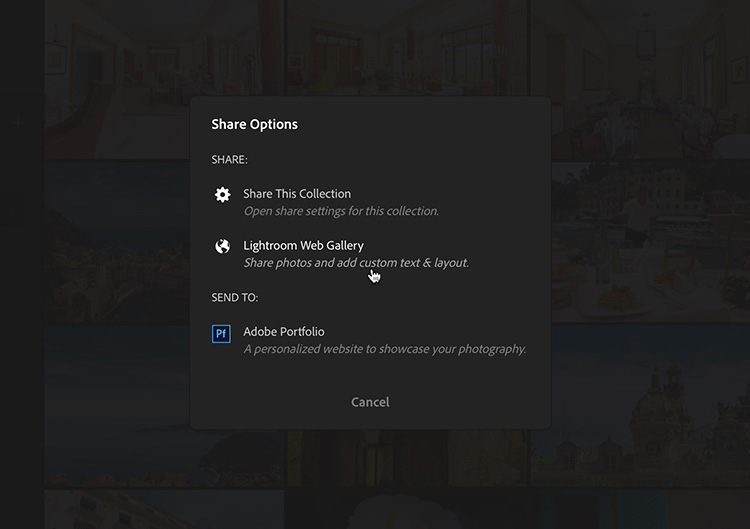
STEP TWO: This brings up the Share Options window. Click on “Lightroom Web Gallery” as shown here.
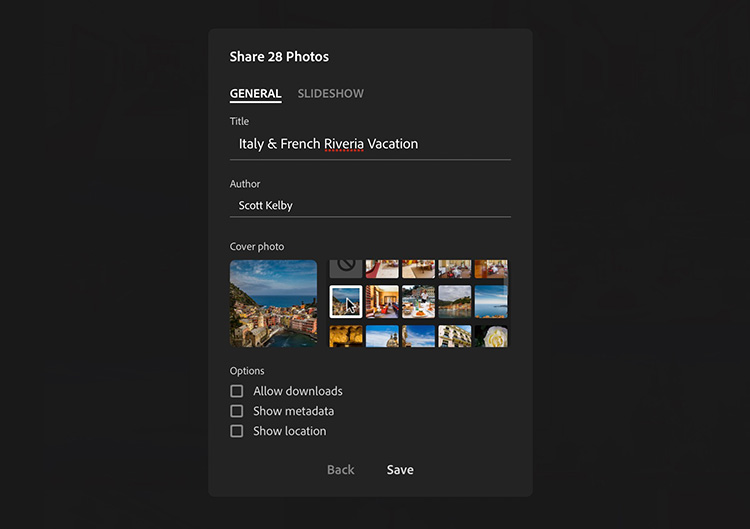
STEP THREE: This brings up the options window you see above where you can name the gallery (this text will appear on top of your Cover Photo), and you can optionally add an Author credit. BTW: The reason it says “Author” instead of “Photographer” is that the whole idea behind using this gallery, rather than just sharing a collection, is to share a ‘story’ using images and words. To choose which image becomes your large-size cover photo, just click on its thumbnail in the Cover Photo area. At the bottom there are also options for allowing people who view your gallery to download the image; see your metadata or your GPS location info. When you’re done, click Save to create this gallery (don’t worry — this gallery still isn’t public — you have to choose to share in the next screen, but at least you’ll be able to see and edit your gallery in the next screen).
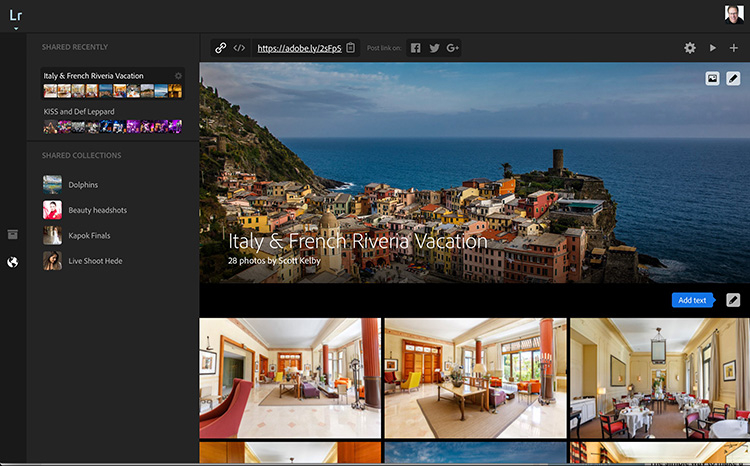
STEP FOUR: Here’s a preview of your gallery. You can see the Cover Photo and title overlaying it at the very top.
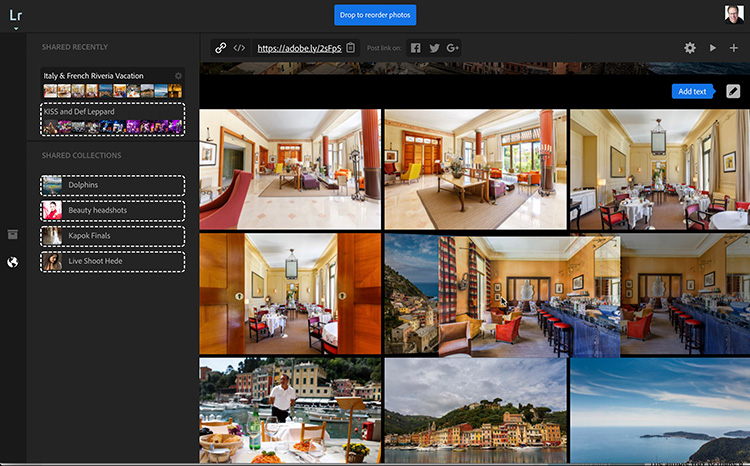
STEP FIVE: To rearrange the order of your thumbnails, you can just drag and drop them. Here I’m dragging the 6th photo (2nd row far left) over to the 5th position (2nd-row center), and you can see the outline of my thumbnail replacing the image behind it.
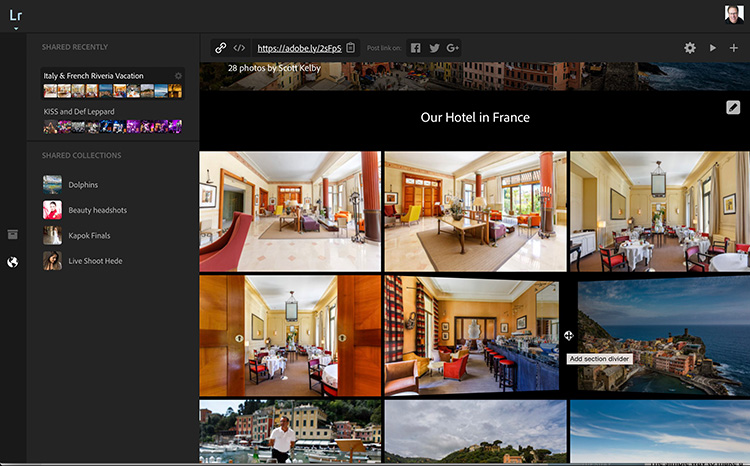
STEP SIX: To add text, just click the pencil icon on the far right. Here I added “Our Hotel in France,” but then I separated those hotel shots from the rest of the images (including the ones taken in Italy) by holding my cursor in-between any two images and the images bend inward like a door open, and in-between the images you’ll see a circle and a plus-sign. Click on that plus sign and it creates a visual Section Divider between the sections of images (seen in the next image).
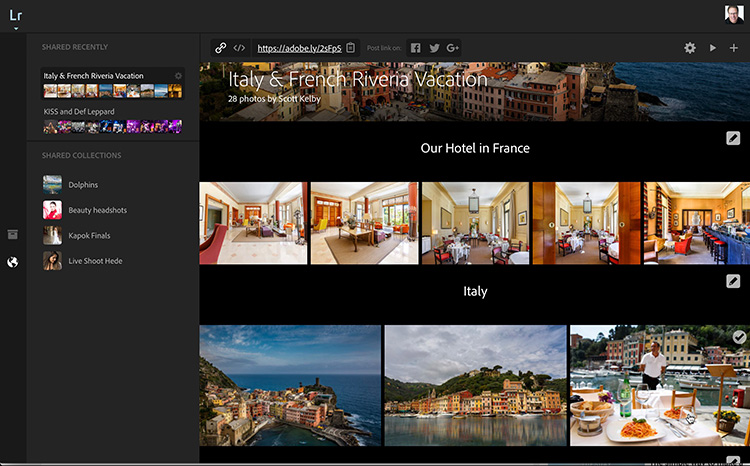
STEP SEVEN: Here you can see the sections divided, and I added the text “Italy.”
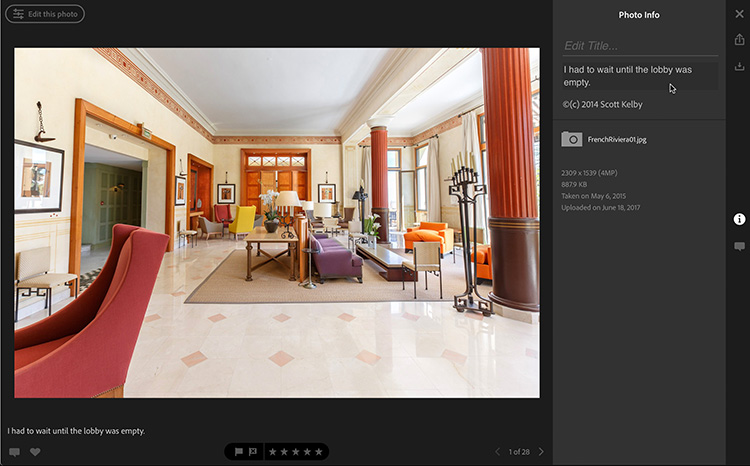
STEP EIGHT: You can add a caption to any photo, so when somebody looks at your image large size, they’ll see your caption in the lower lefthand corner. To do this, double-click on the photo, then click the ‘i’ icon on the far right side of the screen and a sidebar slides out on the right side where you can enter a title and/or a caption (this is also where any metadata on the photo you chose to include will appear).
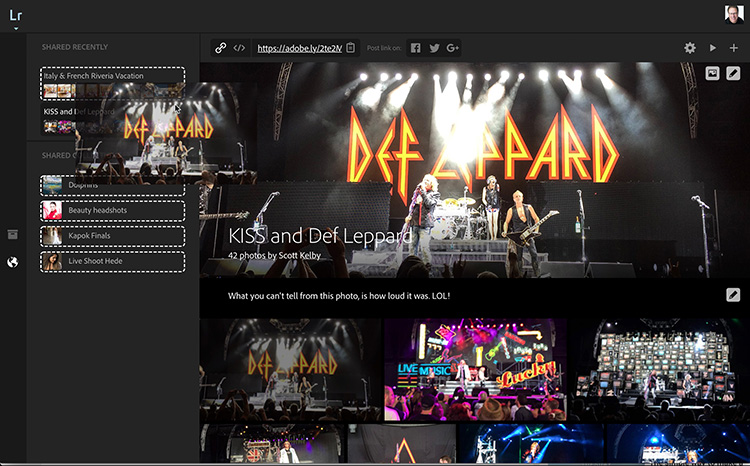
STEP NINE: Another big advantage of these galleries, over just sharing a collection is; not only do you not have to share all the images in a collection, better yet you can drag and drop images from any shared collection into your gallery, like I’m doing here where I’m taking an image from my KISS and Def Leppard Collection and dragging and dropping one of the images up to my Shared web gallery in the top left corner (the dotted lines on the left show places you can drag and drop your images).
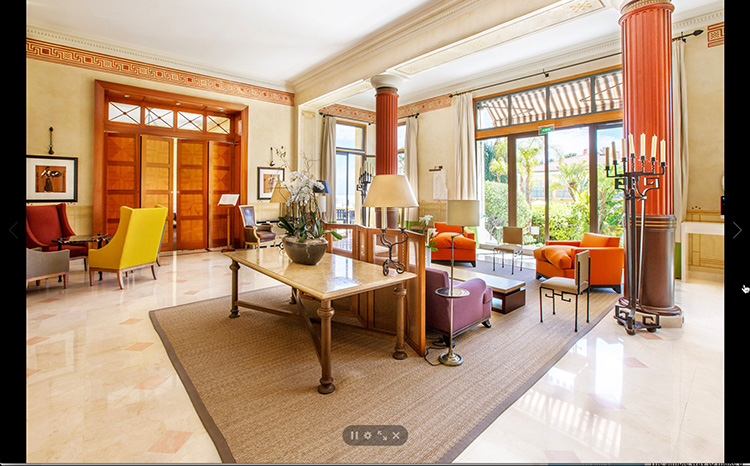
STEP 10: Another nice feature is the slideshow — if they hit the Play button, you get a full screen, auto-advancing slides, with forward and back arrows on either side and a set of simple controls at the bottom.
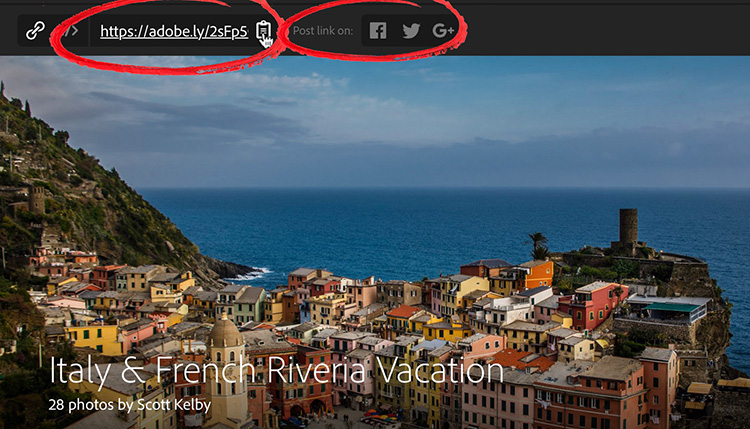
STEP 11: When you’re ready to share your gallery, you’ll find the URL (web page link) right at the top left of your image area (circled in red on the left). Click on the Clipboard icon to copy this address to your clipboard so you can email it to text it to anyone you want to view this gallery (only the people that have this link will be able to see the gallery). If you do want to make it public, you can post the link directly to Facebook, Twitter or Goggle+ using the icons to the right (I circled it in red on the right above).
There ya have it! (There are probably more features because I keep uncovering more, but we’ll save those for another day. Once I get to 10-steps, I feel like it’s time to pull the plug). 😉
Hope you all have a great day, and we’ll catch ya back here tomorrow. 🙂
Best,
-Scott
P.S. We added stops in Richmond and Nashville to my “Lightroom On Tour” full-day seminar, coming in July. Get your tickets now and come spend the day with me learning Lightroom like a boss!


