Sharing a Lightroom Collection With Anybody (in five quick and easy steps)
OK, wanna share a collection with…well…anybody in just five really easy steps? (Note: the person you’re sharing this collection with, doesn’t have to have Lightroom, or an Adobe account, or anything like that — just a Web browser).
Here’s how:
![]()
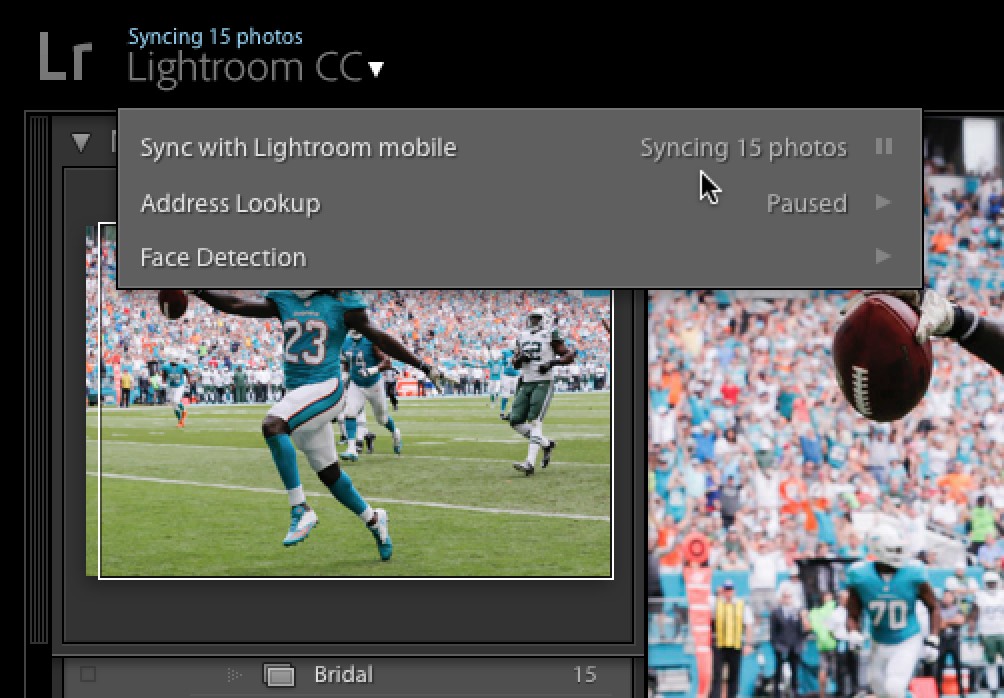
STEP ONE: Click on the “Lightroom CC” name up in the left corner of your screen and turn on “Sync with Lightroom mobile.”
NOTE: You don’t have to have even downloaded ANY of the mobile apps to do this sharing technique — so just turn on syncing (don’t worry, nothing syncs anywhere until you tell it to, and we’re only syncing one collection anyway when we do).
![]()
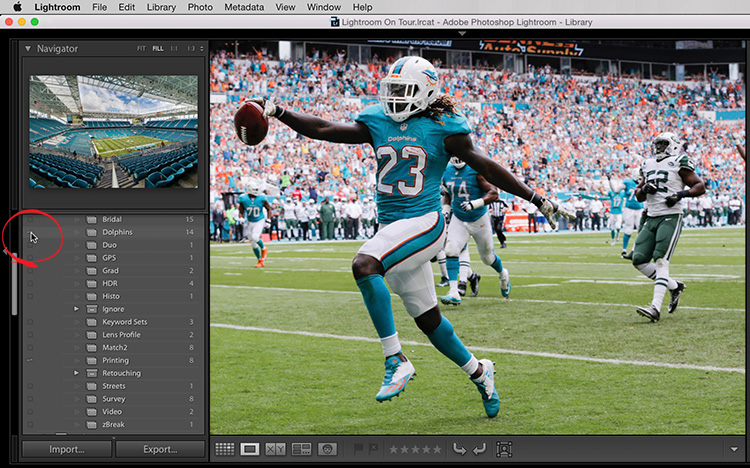
STEP TWO: Click on the little square to the left of the collection you want to share (in this case, I’m sharing a collection from a Dolphins game I shot last season). That square only appears when you turn on “Sync” so if you skipped Step One, you won’t see that square there (I don’t have a square to spare!).
![]()
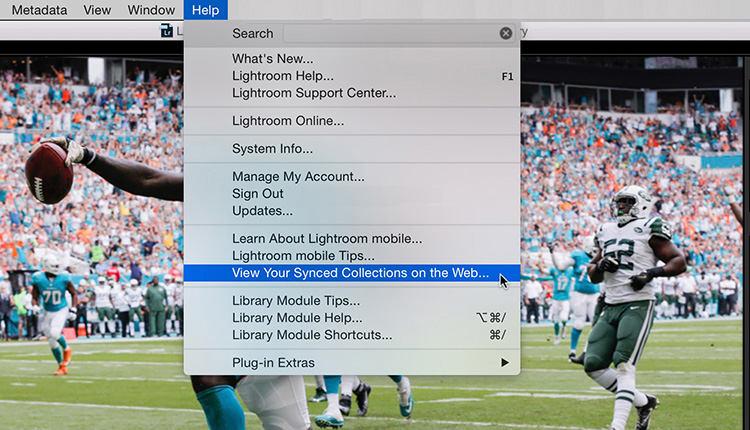
STEP THREE: Go under Lightroom’s Help menu and choose “View Your Synced Collections on the Web” (as shown above).
![]()
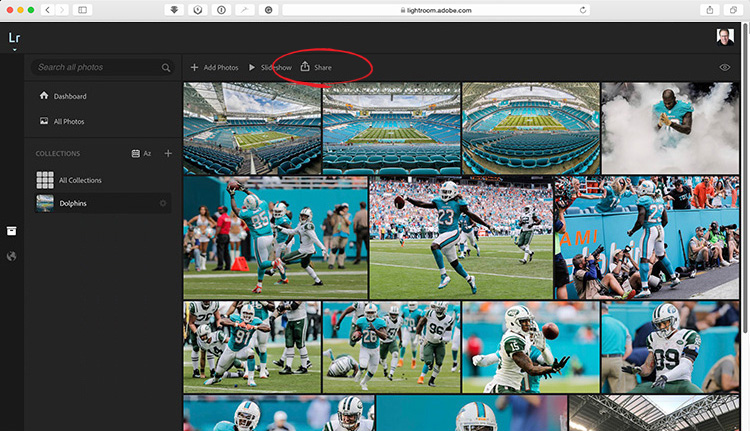
STEP FOUR: Choosing that menu item launches your Web browser and takes you to lightroom.adobe.com – where you simply sign in with your Adobe user name and password, and voilá — there’s your synced collections, beautifully displayed on the Web. You can click to see larger images, the whole nine yards. That’s all well and good, but that’s just sharing with you — the whole idea is to share with somebody else. So, click the “Share” button at the top of the thumbnail grill (I circled it here in red).
![]()
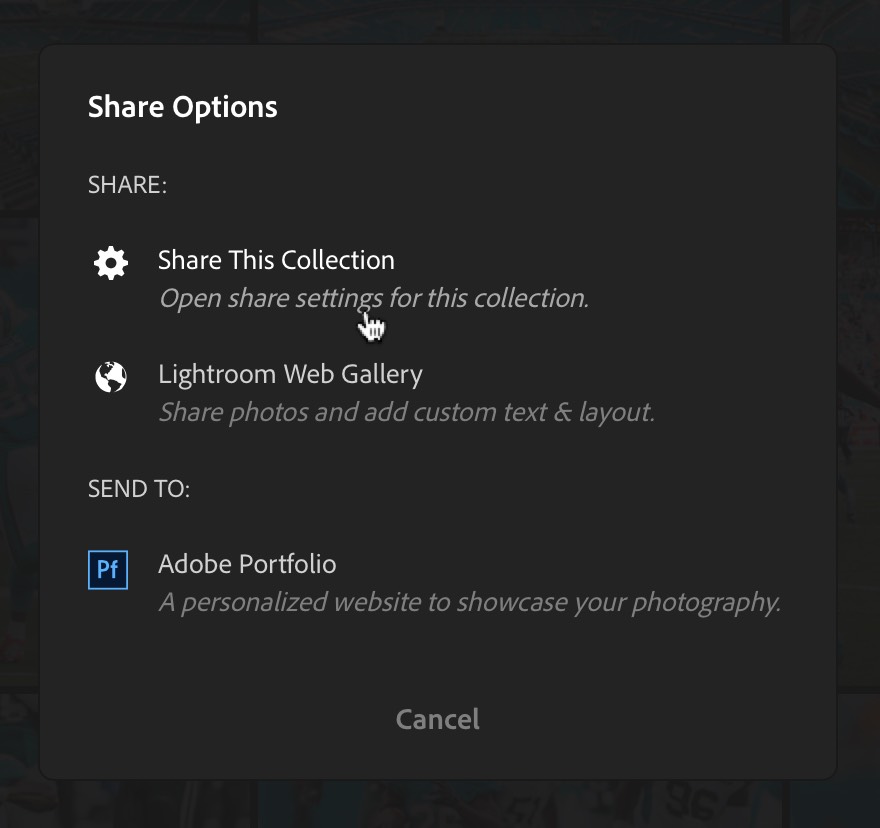
STEP FIVE: This brings up the Share Options dialog (shown above). They want to make REALLY, REALLY sure you want to share this collection (and give you some other options), so start by clicking “Share this Collection” as shown here. Wait, there’s more.
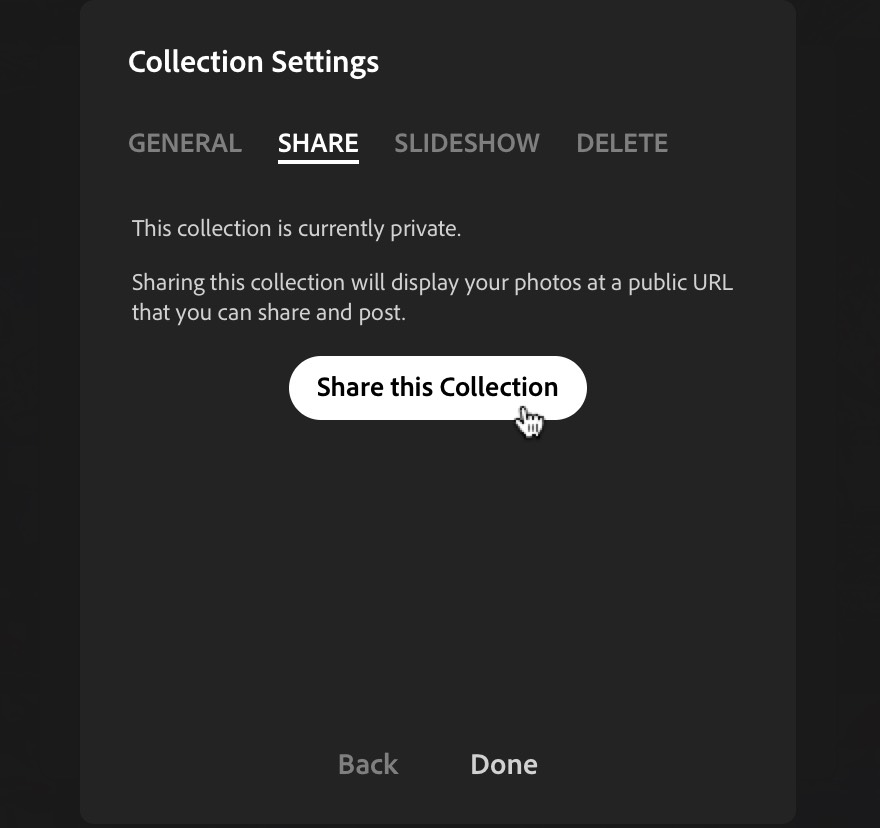
Above: Another dialog appears, letting you know that “This collection is currently private” but if you still want to share this collection (where anyone you give the Web address to will be able to see it), then you’ll have to click another button (just to be doubly sure). If that’s you (and it is, by the way), click “Share this Collection” as shown above. There are still sharing choices (options) to make — that’s next (and no, these three screens cannot be combined into one. That would be too easy). 😉
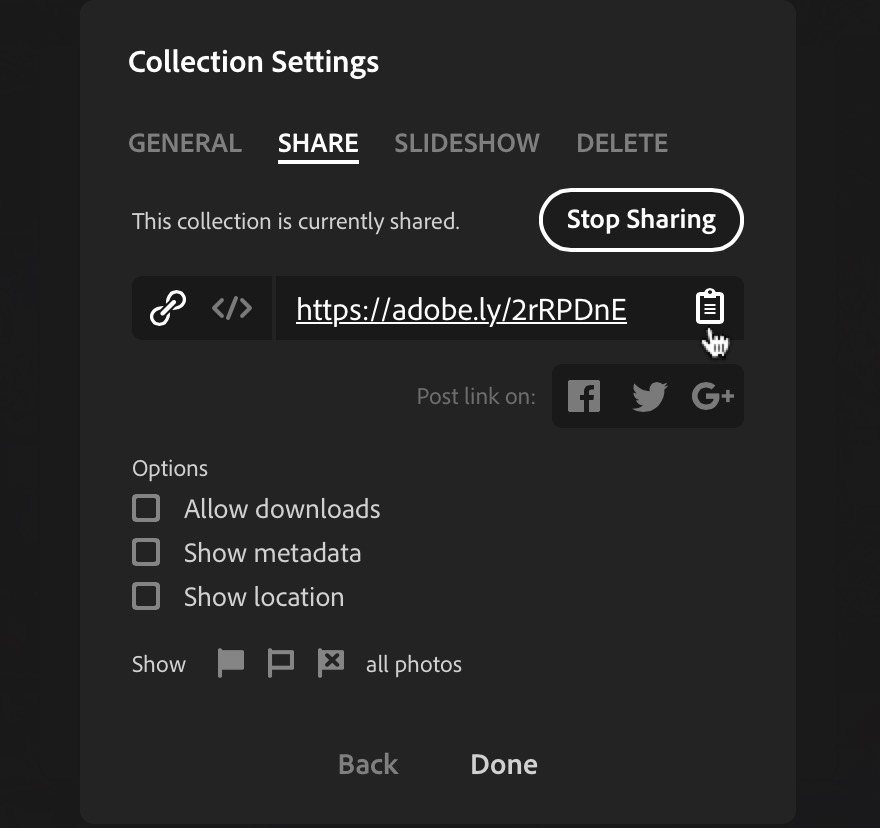
Above: This dialog shows you the URL (web address) where your collection is now shared. If you click the little Clipboard icon (as shown here), it copies that URL to your computer’s memory, and you can copy and paste that in an email, in a text, etc. to share this collection with whoever you’d like. If you want to share this collection publically, you can post this link on Facebook, Twitter, or G+.
They also give you some options — for example: if you want the images in this collection to be downloadable by the person(s) viewing this collection online, turn on the “Allow Downloads.” Turn on the Show Metadata if you want people to know what f/stop you used, and such, and turn on Show Location, if you want them to know where you took the shot, provided you have GPS data embedded into the file.
Lastly, using the flags, you can choose to just “Just the picks” from this collection; just the “unpicked” images; or the most curious choice of all, “just show my rejects” (that last one has to be pretty popular I’m sure). 😉
OK, there ya have it – five steps to sharing your collection with anybody, anywhere. 🙂
Don’t forget: the one and only Moose Peterson is my guest on The Grid today at 4 pm EDT (here’s the link) – we’re talking about how to get sharp photos. At 2 pm EDT, we have a KelbyOne members-only live Q&A Webcast with Moose on wildlife photography. Hope to see you at one or both later today. 🙂
Best,
-Scott


