In my continuing series on sharing options from Lightroom Classic (LrC) we started with the Export dialog and then looked at some cloud service options for sharing exported copies. I think the next logical option to consider is sharing to social media, and we’ll use Instagram as an example. The same concepts would apply to other social media outlets though the ideal pixel dimensions will vary with each site.
The workflow for sharing to social media is very similar to the steps I outlined for exporting copies at different print sizes except instead of focusing on print sizes in inches we are concerned about display sizes in pixel dimensions. File type and color space are just as important as when exporting for printing, so we’ll pay attention to those settings as well.
Also, just like when preparing photos for printing the aspect ratio of the photo before you export is also the key to getting the exact pixel dimensions for best display results on your desired social media site, and the specific aspect ratio will vary with each site and possibly with the orientation of your photo (landscape vs. portrait orientation).
Controlling aspect ratio and file size
Instagram, like other social media sites are inundated with a constant stream of new photos, and as they are storing all of those photos take steps to manage that stream of data. The primary means for controlling file sizes in terms of bytes is to set limits on the maximum allowed pixel dimensions of each photo and to use a common means of compressing data in the form of JPG compression. So, in order for us to have our photos look their best in this process it is in our best interest to crop our photos to the desired aspect ratio, then configure the export dialog to resize the pixel dimensions to no more than that maximum dimension, and then reduce the file size by using the JPG file format and a reasonable Quality slider setting to reduce the file size of the exported copy. Here are the steps:
Step One: Crop to the optimal aspect ratio for your social media destination. For most social media sites the optimal image sizes tend to remain constant over time. Sure, they may eventually evolve as screen resolutions evolve, but this happens slowly. Just do a search for “best photo size for [insert social media here]” and you’ll likely find the site in question (in this case Instagram) has published that information.
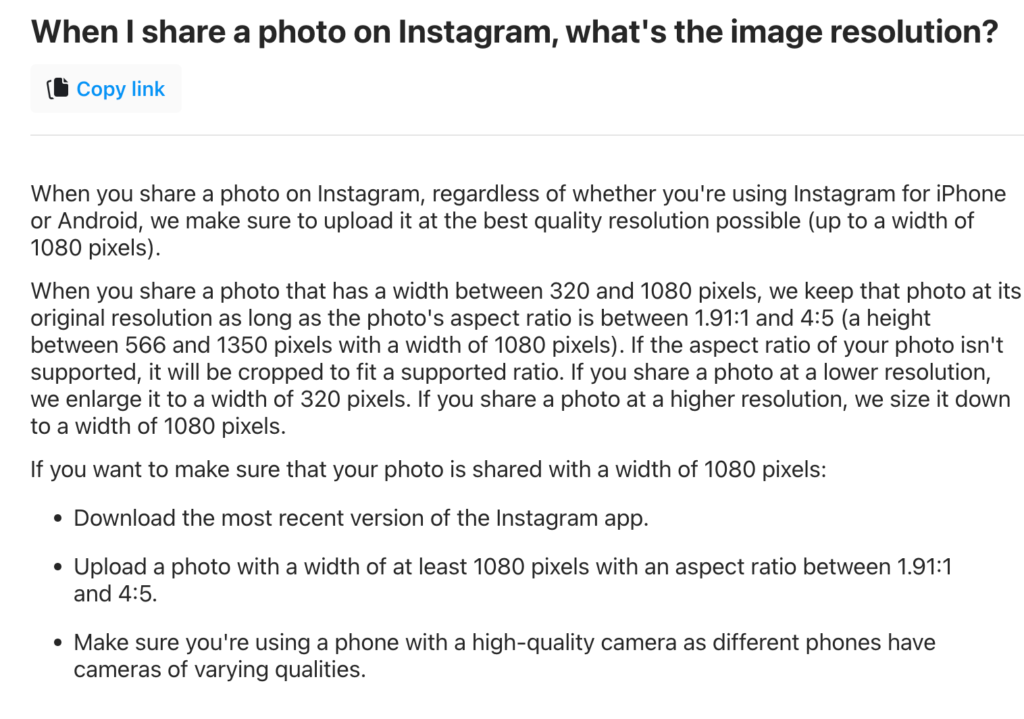
For Instagram, there are three aspect ratios to consider for sharing photos in regular posts. There’s square (1:1), portrait (4:5), and landscape (1.91:1). An aspect ratio is simply a way of expressing the relationship between the width and height of an image. So, whether your source photo is portrait or landscape to start with, you can choose to crop to any of these three aspect ratios for displaying the photo on Instagram letting your own taste and the content of the photo dictate which aspect ratio you think is best.
For the sake of an example, I’ll use a photo in landscape orientation and crop it to the 1.91:1 aspect ratio to keep it in that orientation. To do that in LrC I’d select the photo and press R to jump to the Crop tool. Then, click the Aspect drop-down menu and choose Enter Custom (assuming you’ve never cropped a photo a 1.91:1 aspect ratio before so it would not show in the list of previous custom aspect ratios). This will open a popup dialog where you enter your desired aspect ratio.
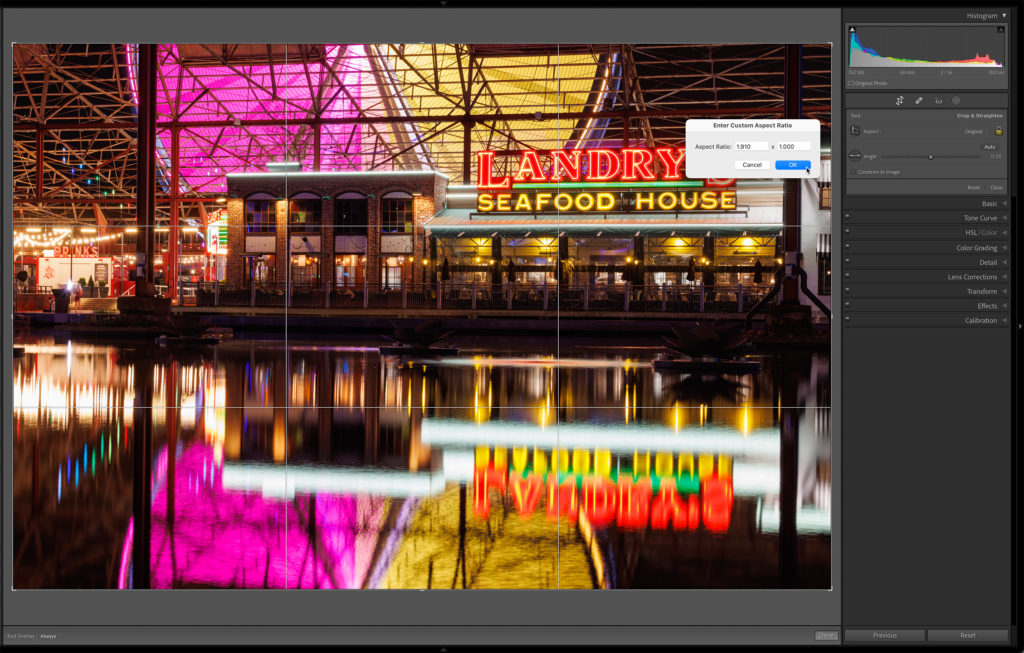
Then, using your own photographic sensibilities, maintain the aspect ratio by ensuring the lock icon is locked, adjust the crop handles to create the best cropped version of your photo. When cropping, I like to press the L key twice to cycle into Lights Out mode to better see the finished version of the crop.
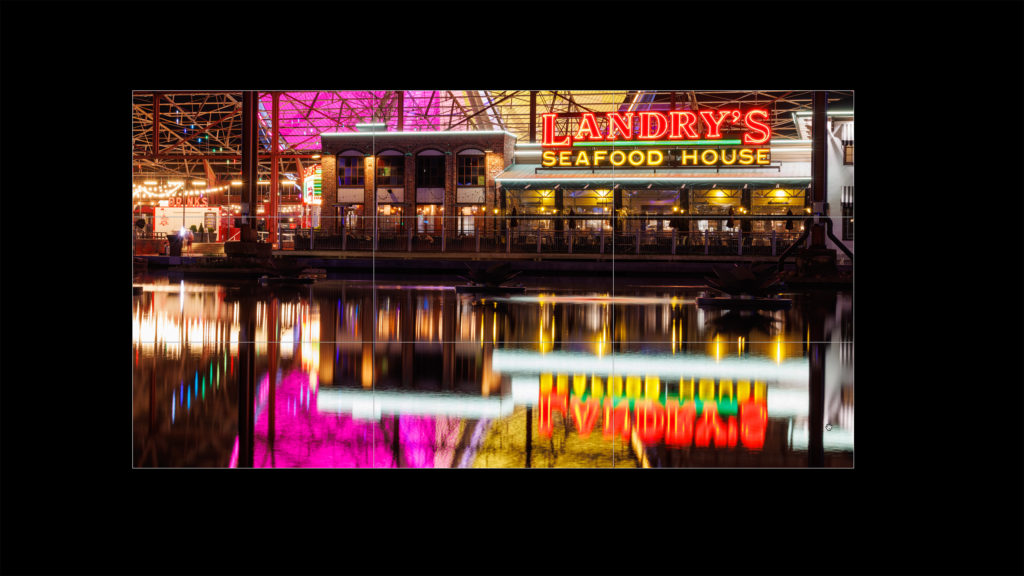
Now wait, you may be thinking that is a pretty severe crop from the original 3:2 aspect ratio, and you’d be right. This is where you need to decide if you want your photo to fill the viewing area on instagram or do you want to have a border around the uncropped photo. There is no one right answer for everyone, and I know plenty of photographers who would not ever crop a photo in post production if it was at all possible to avoid, and that’s fine. I’m not saying you should crop every photo, I’m just showing you how to conform to Instagram’s display size. For the sake of this example I’ll accept the crop and now I’m ready for the next step.
Step Two: Export a copy with the optimal settings for the intended destination. With your cropped (or uncropped) photo selected, click the Export button (File > Export) and configure the Export dialog for location of saved copy, file type, color space, image sizing, and (optional) sharpening. The important settings are choosing JPG for file type, sRGB for color space, and setting the long side to 1080 pixels for landscape and square photos or 1350 pixels for portrait (by setting the long side the short side will be resized proportionally so we don’t have to worry about that).
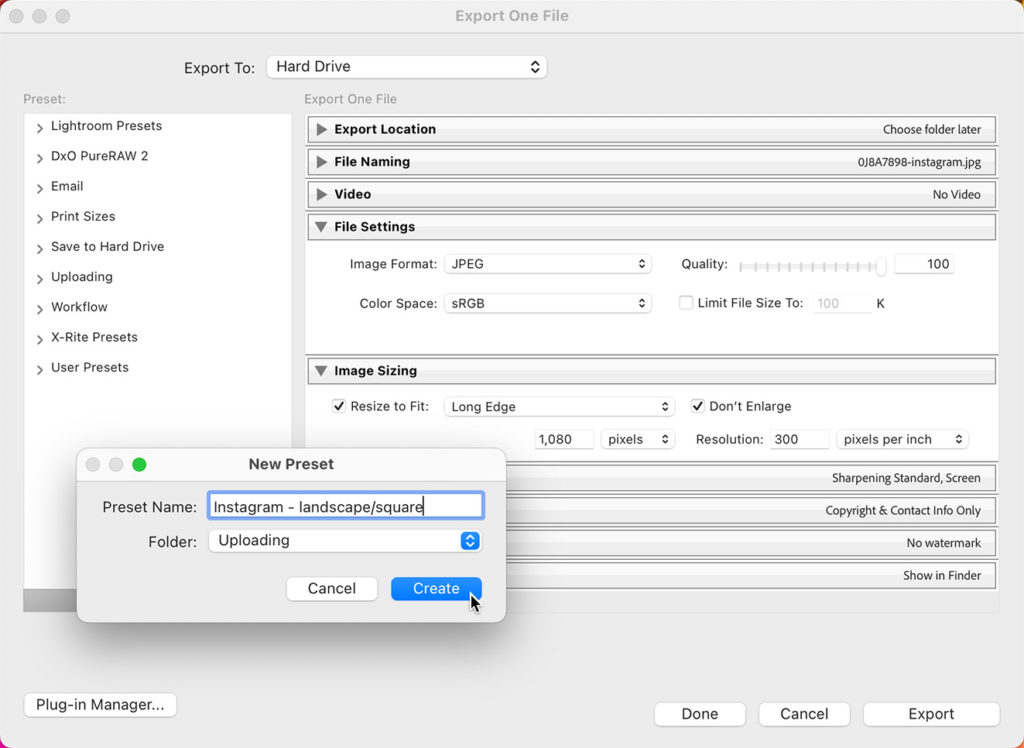
The one area where there seems to be differences in opinion is the value of the Quality slider for JPG compression. In some simple tests I exported copies at 100 Quality and at 77 and then uploaded to Instagram. The file sizes of the ones at 100 were obviously much larger than the ones at 77 straight out of LrC, but the file size of all the copies I downloaded from Instagram after they went through Instagram’s compression were all the same. I compared the various copies downloaded from Instagram and there were very slight visual differences between the highest quality versions and the lower quality versions, but honestly, I had to look at them at 300% magnification to really see the differences. That said, if Instagram is going to compress them all down to the same size I figure I may as well upload the highest quality I can and let it go. Feel free to do your own tests.
Once you’re happy with the settings for landscape and square photos then I would recommend saving that as a preset for reuse in the future. Then, simply change the setting for the long side to 1350 pixels and save that as a preset for portrait orientation photos. A strong case could be made to only ever export photos cropped to the 4:5 aspect ratio as that makes them display as large as possible in the Instagram feed, and if you want your photos noticed, that can make a difference. You just need to decide a) if you want to crop your photos, and b) what aspect ratio makes the most impact and suits your aesthetic.
We can upload photos through our web browsers directly to Instagram now, so if that suits your workflow, open a web browser, log into Instagram, and upload. That said, with Instagram being primarily designed for mobile consumption, there is an argument to be made that photos uploaded through a mobile device may look better than those uploaded from desktop. You can follow my steps for using a cloud service to easily transfer your exported copies to your mobile device to test that theory, or next week we’ll look at another route for sharing photos from Lightroom Classic. See you then!


