New Lightroom “Collaborative Proofing” Feature
It’s not a fully complete feature yet — it’s a “Technology Preview” so Adobe is still working on it, and still taking your feedback (in fact, they ask for it right on the proofing page, which I think is awesome).
If you need to send images to a client (or friend) as proofs you’ll find this really helpful (well, more so when it’s fully functional). Here’s a quick overview of the new “Collaborative Proofing” technology preview where it’s at right now in the development phase.
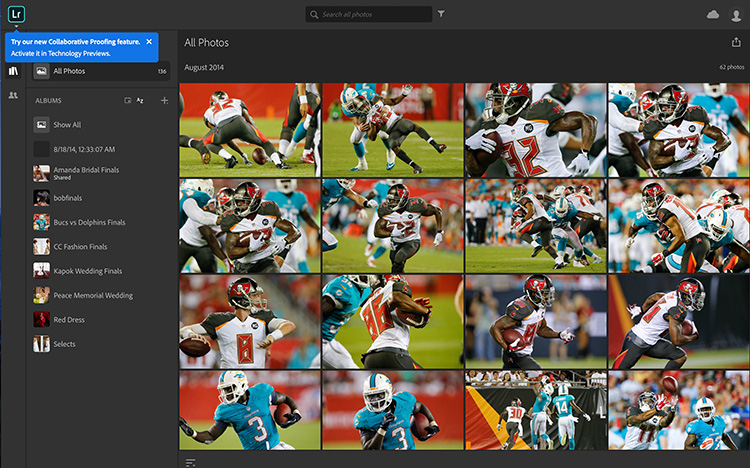
STEP ONE: You have to have synched a collection of images to Lightroom Mobile (Lightroom CC) to enable proofing, so that’s really your first step. Then in your Web Browser go to lightroom.adobe.com and log-in with your Adobe ID. Then look up in the top left corner of the screen and you’ll see a blue pop-up dialog asking if you want to enable Collaborative Proofing. Click on the LR icon. From the pop-up menu that appears, choose “Technology Previews.”
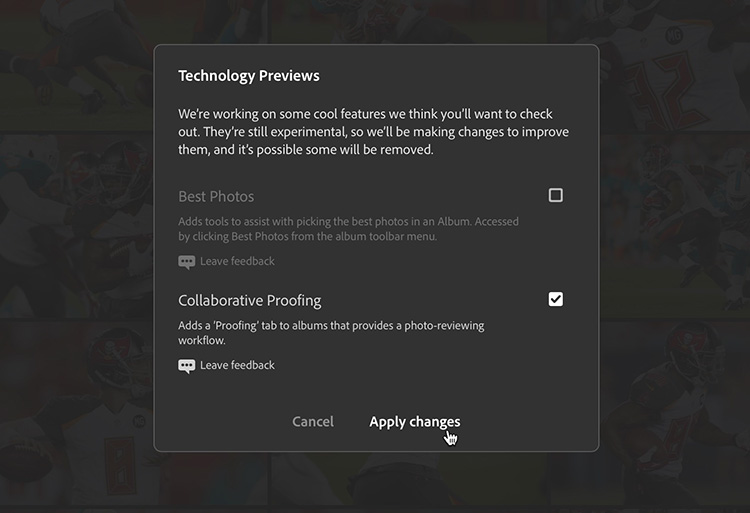
STEP TWO: This brings up the Technology Previews window (shown above). Turn on the checkbox for Collaborative Proofing and then click the Apply changes button (as seen here).
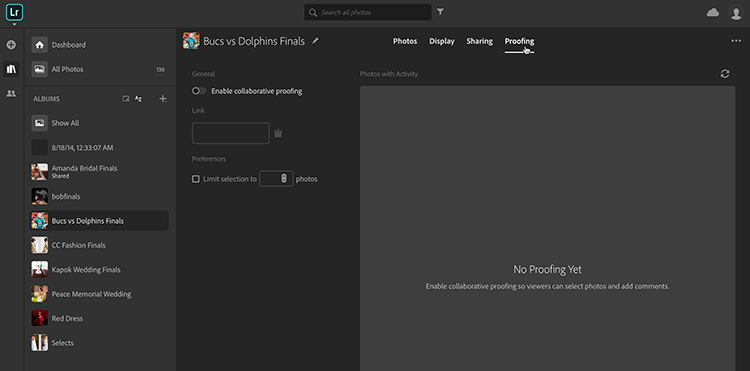
STEP THREE: Now, click on the collection you want to have available for collaborative proofing. Above your thumbnail

STEP FOUR: If you click the clipboard icon next to the link, it copies the link to your clipboard. If you share that link with someone, to mark a photo as a selection, or to leave a comment on an image they will have to sign in with an Adobe logo (and it tells them that right on
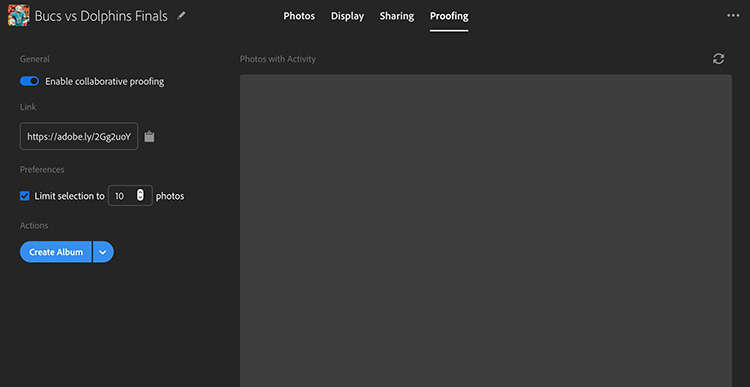
STEP FIVE: Their selects and comments will appear in the proofing panel. Well, I believe that’s the plan anyway, but after clicking the refresh/sync button in the top right corner numerous times, none of the nine images selected by my test clients ever showed up.
UPDATE Friday 4:04 pm ET: It’s working now (see below). 🙂
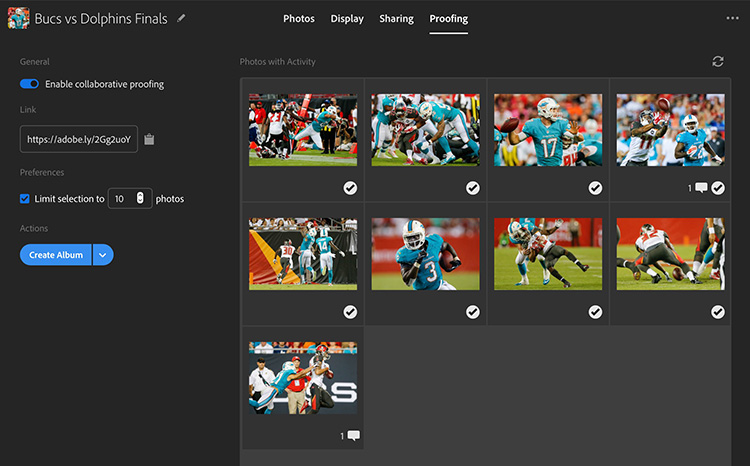
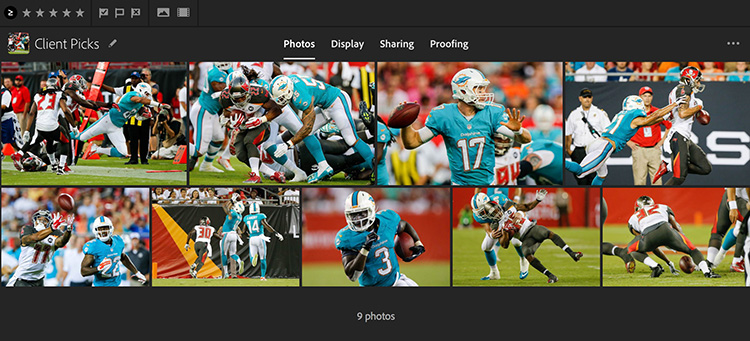
If you click on the blue “Create Album” button, it takes the 9 images my test clients selected (two different people) and puts them in their own separate album, so you can see which ones they chose.
Give it a try yourself and see what you think. Here’s to a great Easter weekend, everybody! 🙂
-Scott
P.S. Want to learn more about Lightroom in three days than you have in three years? Come join us at the Photoshop World Conference in Orlando, May 31st – June 2, 2019. It’s a Lightroom love-fest. Here’s the link with details.

