Fixing Family Photos in Lightroom Classic
The objects we’re most likely to grab on the way out of a burning building are our family photos. Here are some tips to help you get the most out of Lightroom when trying to make some corrections to the most common issues you’ll encounter with older digital photos. Our favorite and most cherished photos may not be the best ones we’ve ever taken, but rather those where the moment or the people captured within them are more important than camera settings. As I look back through thousands of my family photos I see so many examples of bad lighting, on-camera pop-up flash, incorrect white balance, horrible framing choices, red eyes, and other problems that can diminish the impact of these photos. The obvious solution for many of these photos may be to simply delete them, but if a certain photo is too sentimental to send to the trash then let’s look to Lightroom to see what can be done to improve or outright fix the most common problems plaguing our old family photos.
Process Version
If you’ve been using Lightroom for a long time then you may have some photos that were originally imported into a much older Lightroom catalog, and then that catalog may have since been upgraded over and over to the latest version. For example, I have photos that were originally imported into Lightroom 1, and then that catalog has been upgraded to each subsequent new version since. However, while the catalog itself is upgraded to the new version Lightroom does not change the processing applied to these older photos, so photos imported and processed (or not processed) into a Lightroom 1 catalog would have the original Process Version used at the time.
The reason this is important to know is that as Lightroom has evolved so has the Process Version. When Process Version 2010 was introduced it brought improved sharpening and noise reduction algorithms. With Process Version 2012 we saw some old adjustments evolved (Brightness, Recovery, Fill Light) into new ones (Highlights, Shadows, Blacks, and Whites). The most recent update to Classic 8.0 brought a new process version (Adobe switched from naming process versions by year to just numbers, so we’re now up to Version 5) with improvements to negative dehaze and some high ISO images. To get the most out of Lightroom’s current suite of tools you want to be using the latest Process Version when you tackle these old photos. Newer adjustments, like Dehaze, won’t even work with the older process versions.
Looking at this photo from 2001 you can see a few clues as to the Process Version applied to a photo. First look in the Histogram panel and if you see a lightning bolt icon Lightroom is telling you this photo is using an older Process Version. If you look in the Basic panel and see the older adjustment sliders that is another clue. The same would be true if the local adjustment tools were only showing older adjustment sliders, or if Dehaze was grayed out.
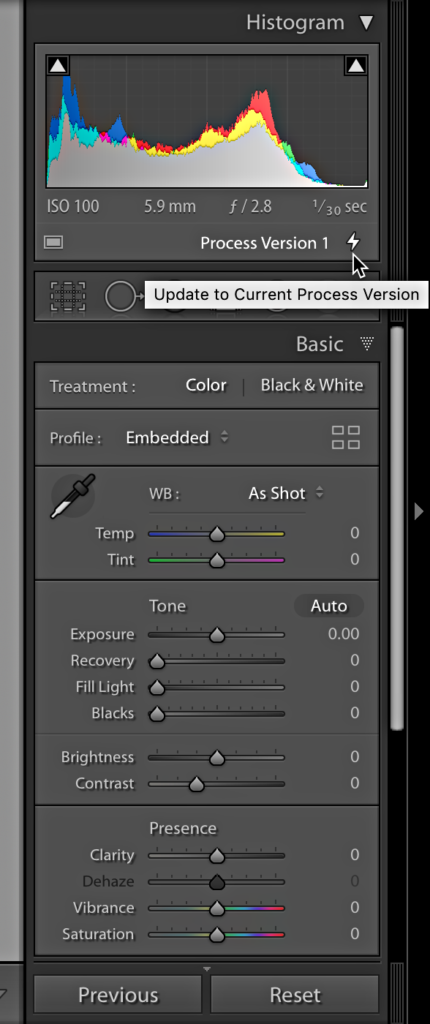
You can upgrade that photo to the new Process Version by clicking the lightning bolt icon, which will open the Update Process Version dialog box.
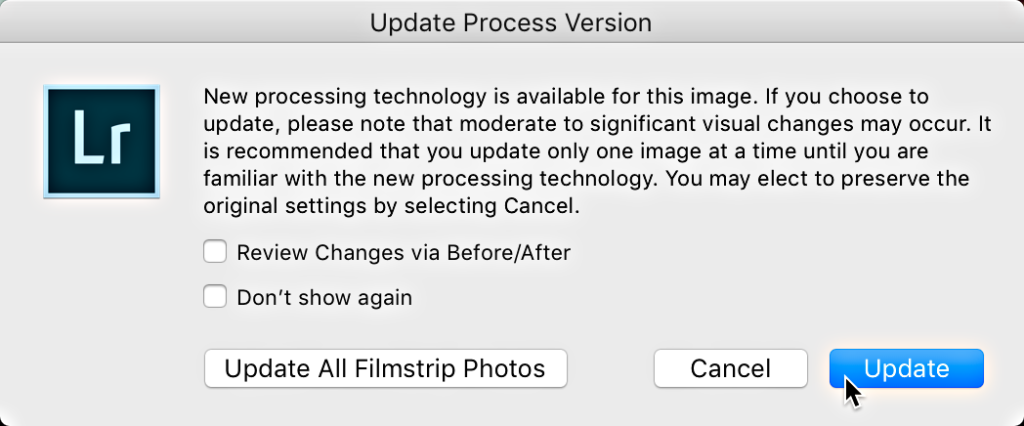
Here you can update the selected photo, or even all photos in the Filmstrip. It is recommended to only update one photo at a time to get a feel for how this can change a photo, but if you are dealing with a lot of previously unprocessed photos, then you may just elect to update all of them at once. Note, you don’t need to update the process version just because it is new. I only do it if I am re-editing an old photo to gain the benefits of a newer process version.
Alternatively, clicking the Reset button will reset the photo to the current default settings, which does include the current default Process Version. You can also change the Process Version using the drop-down menu in the Camera Calibration panel.
A New Profile
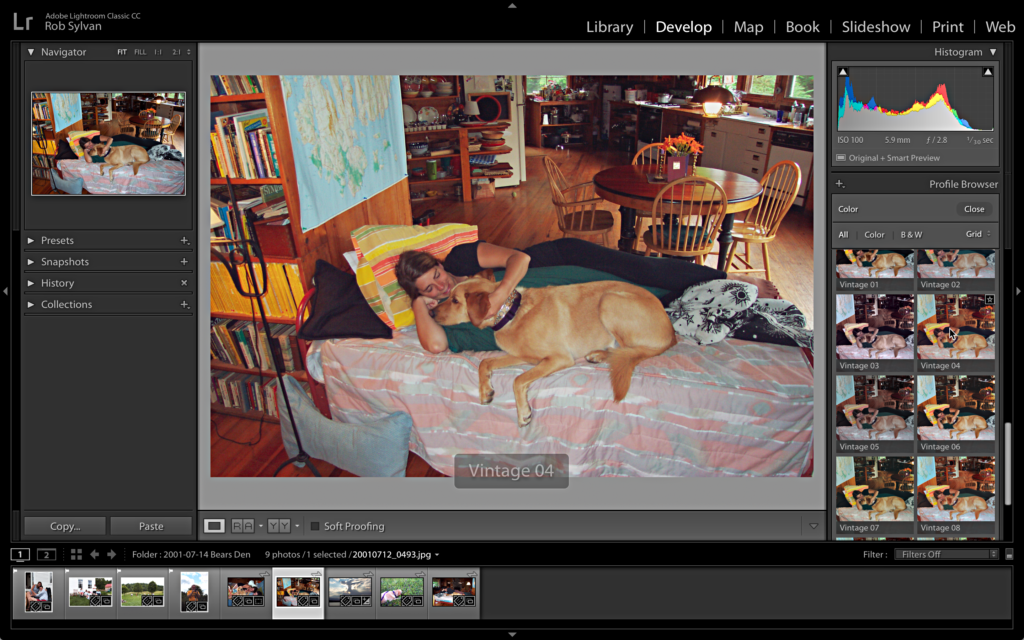
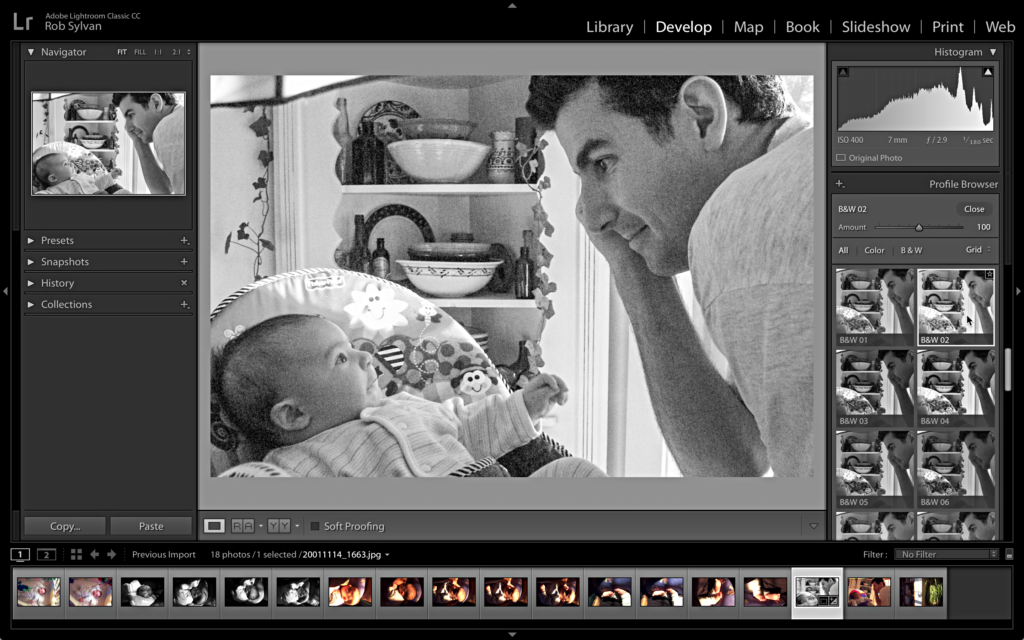
You may also want to consider the Profile being used, as that can have a big impact on the color and contrast of the initial rendering of the photo. Many of my oldest family photos are in JPG format, but there are lots of profiles that work on JPG photos now too. Besides there is plenty Lightroom can do to adjust a JPG, but you will not have the same latitude for adjusting white balance, recovering highlights, or dealing with noise as you would with a raw original. Regardless of file type, open up that Profile Browser and see if there is one to your liking.
Cropping
With your Process Version updated and potentially a better Profile, I often find that a lot of older photos are vastly improved with a good crop. Cropping can remove distracting elements around the edges, can be used to straighten lopsided photos, or maybe you just need to change the aspect ratio to fit the print size you want to make. It is also worth noting that the Histogram reflects the area within the crop, so cropping out an area with blown highlights will change the Histogram accordingly. For example, here’s a photo of me and my son gazing at each other. The photo is totally crooked, full of noise, poorly exposed, and has blown highlights, but I love it. This was taken back in 2001 on our first digital camera (a 3 MP Kodak), so the file size is small and the noise is high even though it is only ISO 400. I don’t care so much about the noise, but let’s see what a little cropping can do.
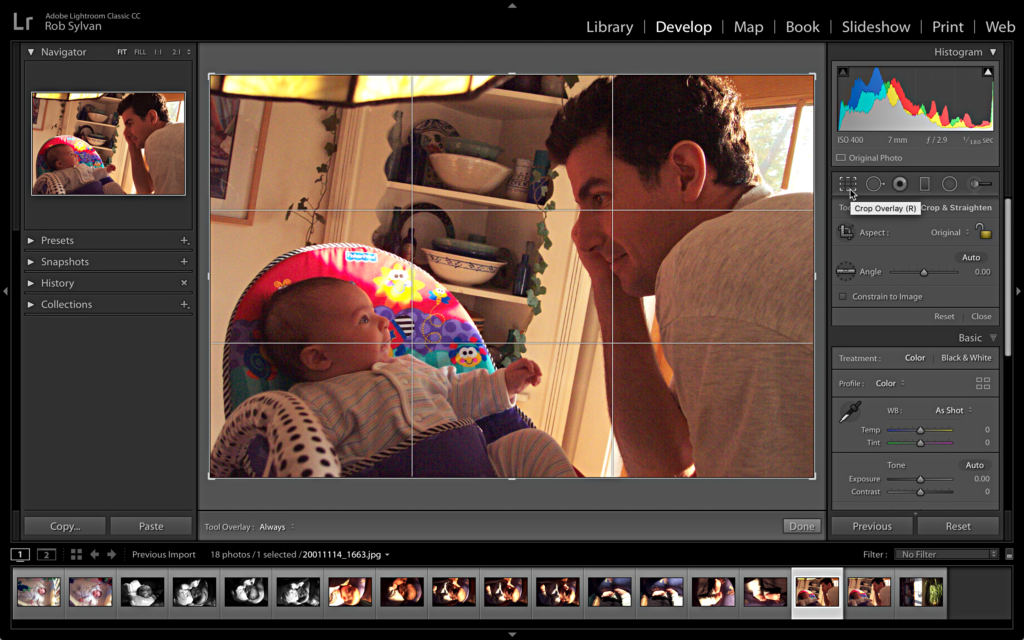
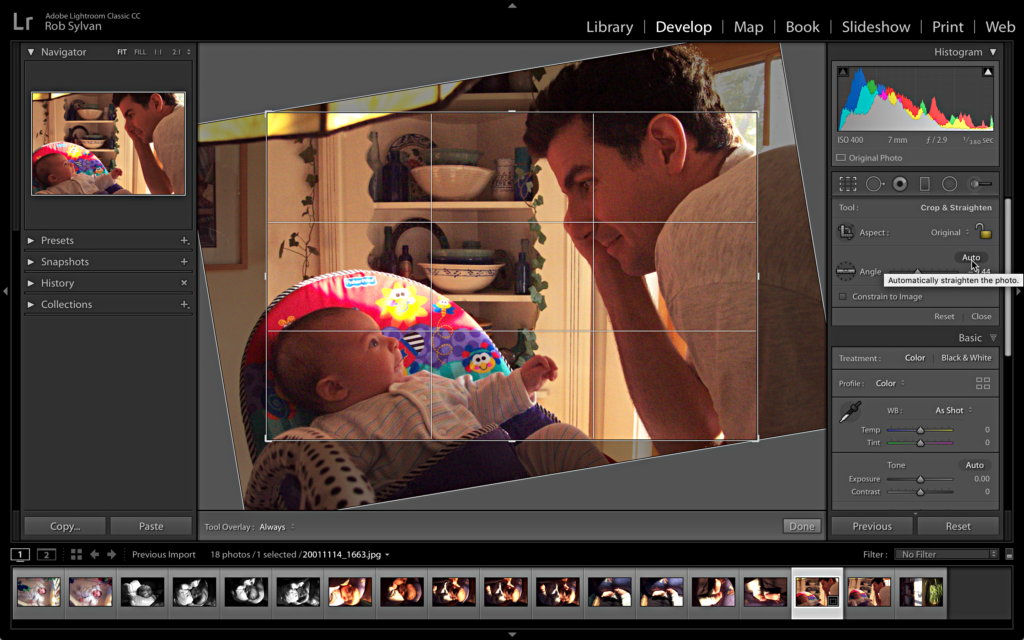
Pressing the R key is the fastest way to jump to the Crop tool, but you can also click its icon under the Histogram panel. Because this photo is so crooked my first move is to click the Auto straighten button to see if Lightroom can automatically straighten it out, which will also crop the photo as part of the process. With one click I straightened the photo and mostly cropped out the blown highlights in the upper-right corner, which resulted in a tighter composition on the most important elements in the scene.
For good measure I applied a B&W profile to finish the job.
Rotating
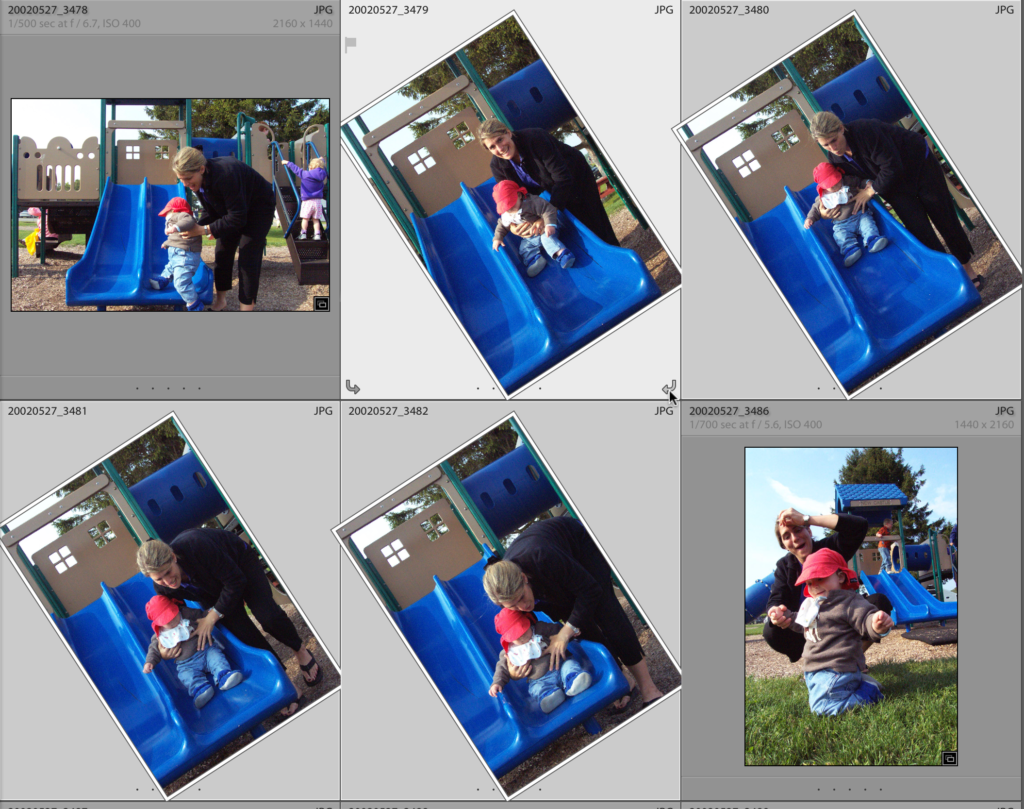
These days digital cameras have a built-in means to determine which orientation the camera was held when the photo was taken, which writes this information into the photo’s metadata so that programs like Lightroom can automatically rotate the photo to display it correctly. However, this was not true of early digital cameras, and if you scan through Grid view of the Library module and come across photos laying on their sides you can easily rotate them all together. Just select all of the photos that need to be rotated the same amount in the same direction while in Grid view. Hold the CMD key (PC: Ctrl) to select non-contiguous photos, or hold the Shift key to select the first and last photo in a continuous row. Once selected, click the correct rotational arrow that appears on the thumbnail, or choose the desired option from the Photo menu, to quickly rotate them all at once.
Red Eye Reduction
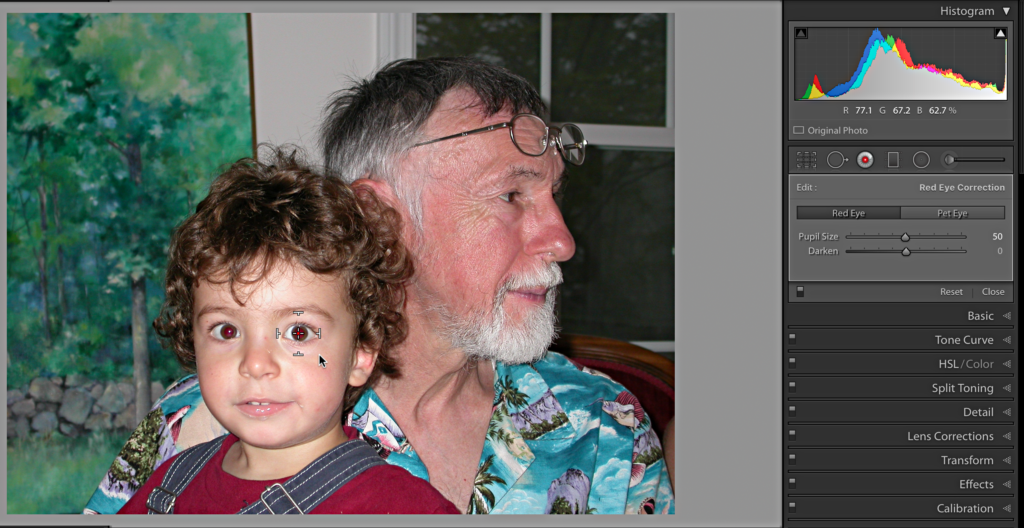
The only time I seem to reach for the Red Eye reduction tool is with those old family photos taken at parties and holidays when the camera just gets passed around to family members, which over time can be some of the most fun photos you have. Lightroom’s Red Eye Correction tool doesn’t have a keyboard shortcut, so you’ll have to click its icon under the Histogram panel to enable it. Once enabled, click and drag from the center of the red eye and then release the mouse once you get outside the eye. Lightroom automatically attempts to detect the red and apply a correction. You can then use the Pupil Size and Darken sliders to refine the adjustment. Once I’ve done the first eye I usually just click on the second eye to use the same size circle I created previously.
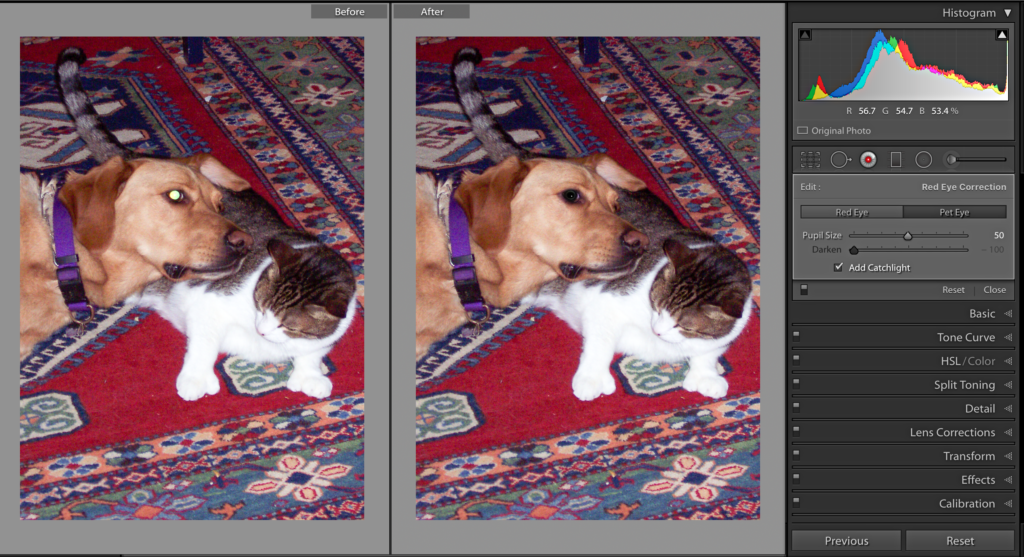
Our pets are people too, so don’t let a demonic dog or cat ruin an otherwise memorable keepsake. With the Red Eye Correction tool enabled, click the Pet Eye tab in the panel to switch over to the new feature added in Lightroom CC. The original Red Eye Correction tool doesn’t work on the yellow eyes we see in our dogs and cats, but this new addition can improve the situation. It isn’t perfect, so don’t expect miracles, but it can tone down a laser yellow eye to save the photo. The Pet Eye tool will only let you adjust the Pupil Size after the correction is made, so you can’t darken it any further. However, it does have the option to add a catchlight, which can give life to what otherwise may look like a dead black hole after the correction.
