Tips For Finding Those Adjustment Pins
The other day Scott shared a great post on Auto Hiding local adjustment pins in Lightroom Classic, and that’s my preferred way to use them too. However, in the comments, Dave and Al asked if there were any tips for making those (darn) pins more visible when you re-visit an edited image and you want to know if you’ve used any of those tools before diving in, especially on a photo that makes those pins hard to see. So, this post is for you, Dave and Al (and anyone else who has ever wondered about this).
First, let me say that there is no magic shortcut for “reveal all adjustment pins” (though that would be cool, and make for a much shorter blog post). What I do have are a few tips and tricks to help you sleuth it out a little faster, and I welcome any additional tips you might have in the comments.
Stop Hiding Them
The first, and most obvious tip is to unhide them. In the above linked post, Scott shows how to set the pins to Auto Hide, but if you jump into any of the three local adjustment tools (Adjustment Brush, Graduated Filter, or Radial Filter) and don’t see a pin make sure visibility is set to Always or Auto (and not Never). Note, that if visibility is set to Auto you’ll only see the pins when your cursor is over the photo.
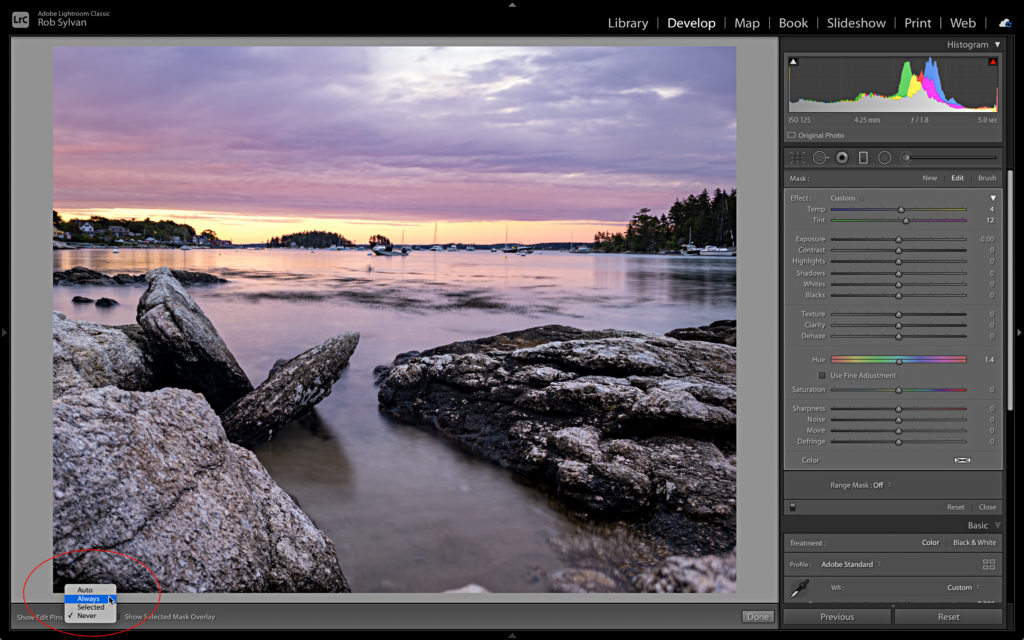
To make that process go a little faster, there are a few keyboard shortcuts you’ll want to memorize:
- K = Adjustment Brush
- M = Graduated Filter
- Shift+M = Radial Filter
- H = Show/Hide pins
So, if I was Al or Dave (or me) and wanted to check a previously edited photo for any of those three types of adjustments I would select the photo and press K to jump to the Adjustment Brush, and if Show Edit Pins was set to Never I would press the H key.
Now the H key’s behavior depends on where your cursor is at the time, which is kind of interesting. If your cursor is over the photo when you press the H key you can toggle between Show Edit Pins Auto and Show Edit Pins Never. However, if your cursor is not over the photo, pressing H toggles between Show Edit Pins Always and Show Edit Pins Never. In either case, if there are adjustment pins on that photo their visibility will toggle with each press of the H key.
Satisfied with the Adjustment Brush, press M to switch to Graduated Filter, and check the pin visibility setting, and confirm if there are pins (or not). And finally, press Shift+M to check for Radial Filter pins.
Now, that was a lot to write out, but in practice, you can switch between all three of those tools in a few seconds. Give it a try.
History Panel?
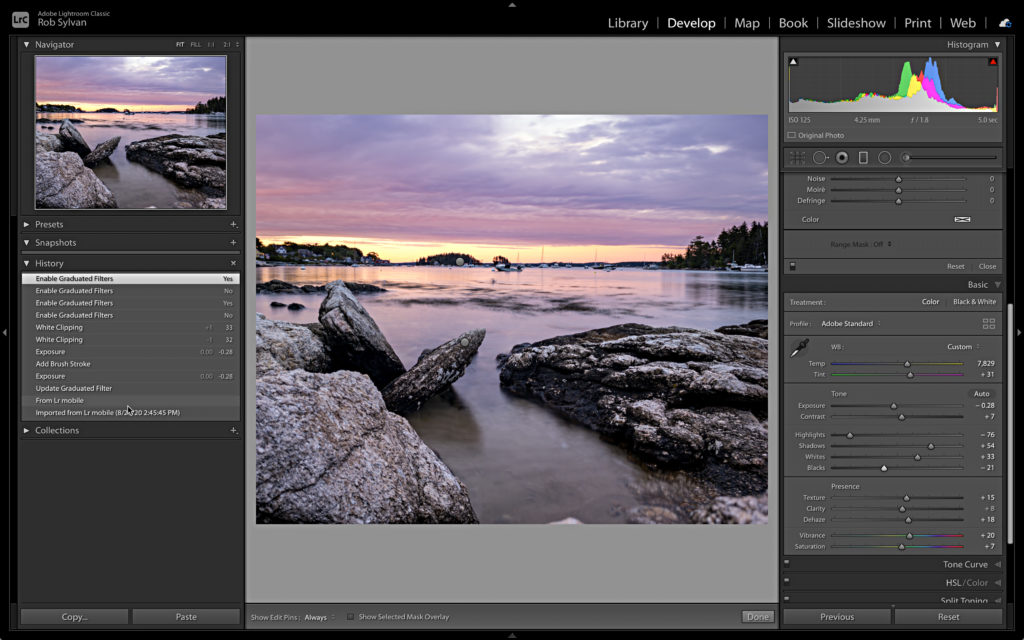
I suppose this could be useful in some cases, so deserves a mention. However, the History panel for heavily edited photos can be longer than your leg, and not super friendly to read. So, a quick peek for a lightly edited image may be quicker than the above keyboard shortcut salad. That said, individual edits made in Lightroom mobile/cloud/cc don’t sync to the history panel individually, they just show as From Lr mobile.
Hard to See Pins
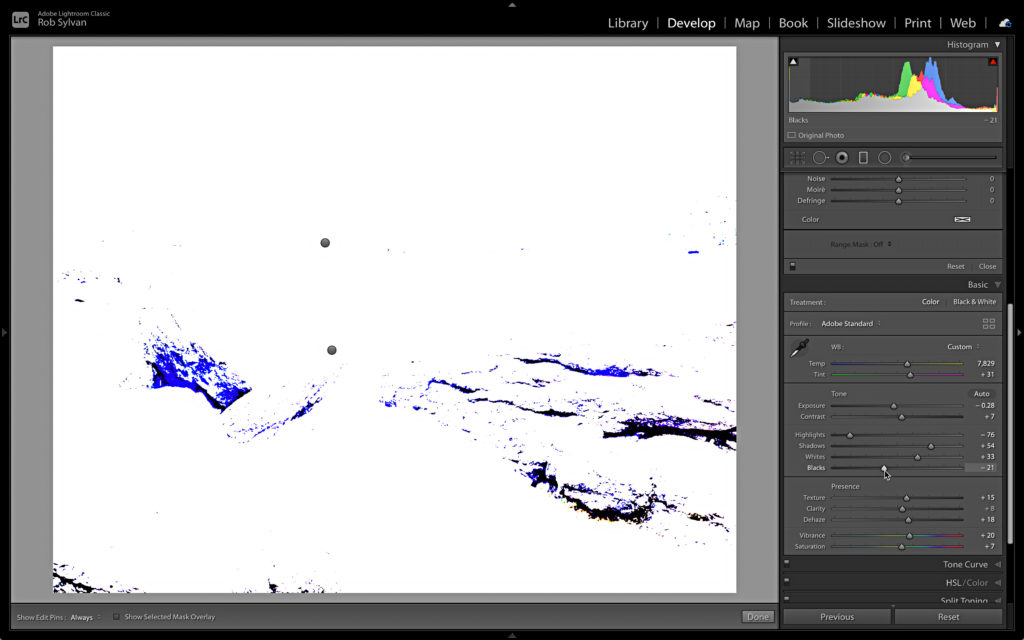
Sometimes the subject matter of your photo can do a great job of camouflaging the pins, and in that case, here’s my best tip for making them easier to spot. Yes, another keyboard shortcut, though using it for an off-label purpose.
You’ll still need to rely on the previously mentioned shortcuts to jump into each local adjustment tool, but while you have a given local adjustment tool active, scroll down to the Basic panel, hold down the Alt/Option key and just click-and-hold the control knob on the Whites or Blacks sliders. Typically, that combo of keys and clicks is for checking white or black clipping, but it does this by making the photo appear all black when clicking on the Whites slider or all white when clicking on the Blacks slider. If you see any color, it just means there is some clipping in the highlights or shadows, but for our purposes here it makes those darn pins jump right off the screen. Note, you’ll need the pin visibility set to Always for this to work.
Take a Page From Lightroom for Cloud
A feature in the desktop Lightroom app for the cloud ecosystem (formerly called Lightroom CC) that I would love to see in Lightroom Classic is the little indicator that appears next to the tool to indicate that it has been used.
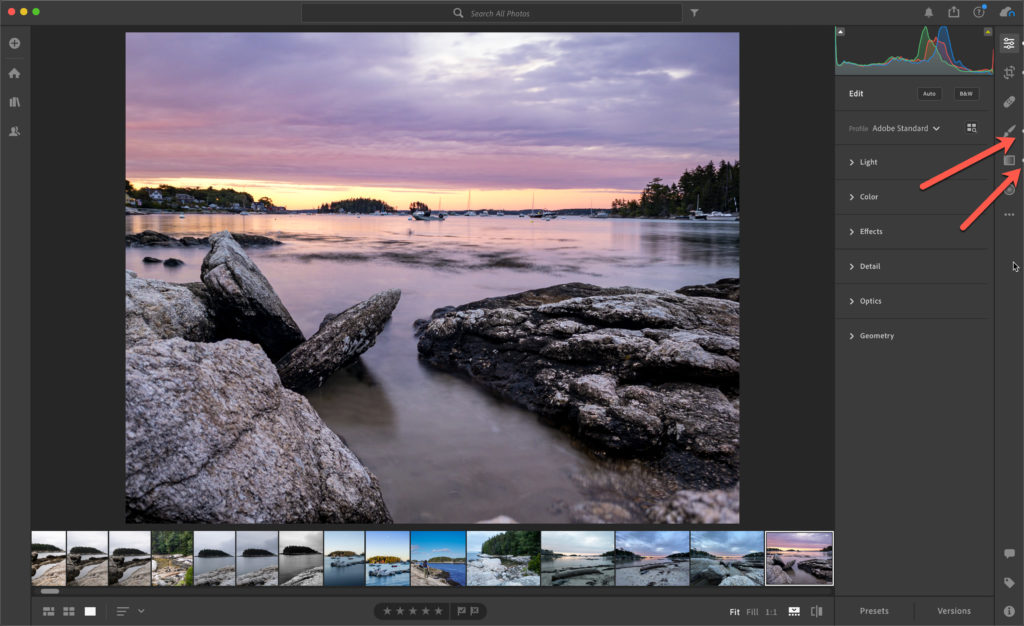
There would have to be some other interface changes made to Lightroom Classic to accommodate this feature, but I think would be most welcome and useful.
Those are my best tips, anyone have anything else that helps you?

