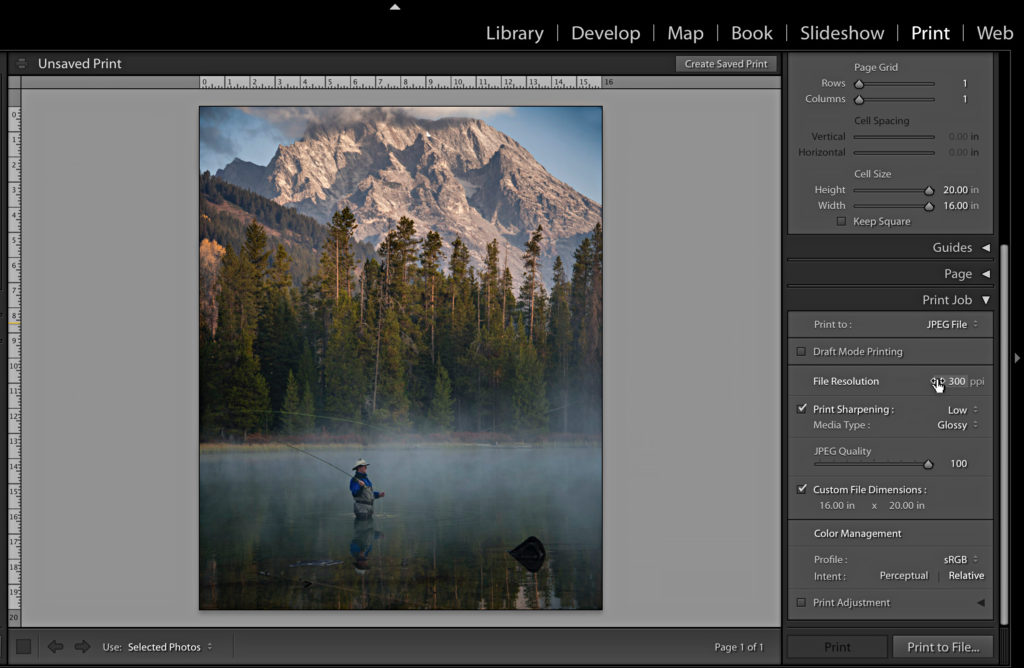
Create Custom Print Size for Saving as JPEG
If you need to save out a JPEG version of a print layout for uploading to an online print service, or maybe create a JPEG version for some other reason, then this little tip is for you.
Print Job Panel to the Rescue
Creating custom print layout sizes is something I’ve seen trip people up. The problem usually stems from the desired print size not corresponding to an existing printer paper size (such as the desired print being larger than their printer supports), or if they don’t have a printer at all. If your goal is to save the layout as a JPEG, you can ignore the Page Setup/Print Settings buttons and just skip over to the Print Job panel. Once expanded, click the Print To drop-down menu and choose JPEG File instead of Printer.
This gives the Print Job panel two new options: one for setting the quality of the resulting JPEG file, and another for setting Custom File Dimensions. Checking the Custom File Dimensions box means that you can now set the size of the canvas based solely on your output needs, printer be darned. This is one of the least discoverable options inside of Lightroom, and the reason I’m writing this post.
There are upper and lower limits to the dimensions you can enter, meaning the smallest size you can enter is 4 inches and the largest is is 100 inches (and the equivalent sizes in other units of measure, based on the Ruler settings). So, if you need to create a layout for a 16 x 20-inch canvas, just enter those values and Lightroom will create the canvas size to match. Whatever size you need, within those limits, is now completely within your grasp.
Role of Resolution
Note, the value you enter in the Resolution field is still very important. This number will control the actual pixel dimensions of the resulting JPEG. Warning, math ahead. Print dimension in inches multiplied by Resolution will determine the pixel dimensions. For example, let’s say we enter a print dimension of 10 x 10 inches, and set the Resolution to 100 PPI. The resulting JPEG will be 1,000 x 1,000 pixels.
10 inches x 100 PPI = 1,000 pixels
Why can’t we set the Ruler’s unit to Pixels, and then simply enter a desired pixel dimension? I don’t know, but I suppose it was simply due to the fact that the Print module’s primary purpose is to produce prints in a physical size, and so they stuck with units that make sense for that purpose. Seems reasonable. Focus on the resolution required to get a quality print at the desired print size, or go with the magic 300 PPI.
As an added bonus, by using Custom File Dimensions there are no minimum margins! As soon as you check that box, you can completely zero out the margins for a borderless layout. Once your layout is all set, configure the remaining settings in the Print Job panel for print sharpening and color management before saving out the JPEG.
Hope that helps!


