Customizing the Metadata Panel
Following up from last week’s post on the changes to the Metadata panel, I wanted to look into how the Default view can be customized to fit your workflow.
Switching back to the Default view, there is now a Customize button at the bottom of the panel.
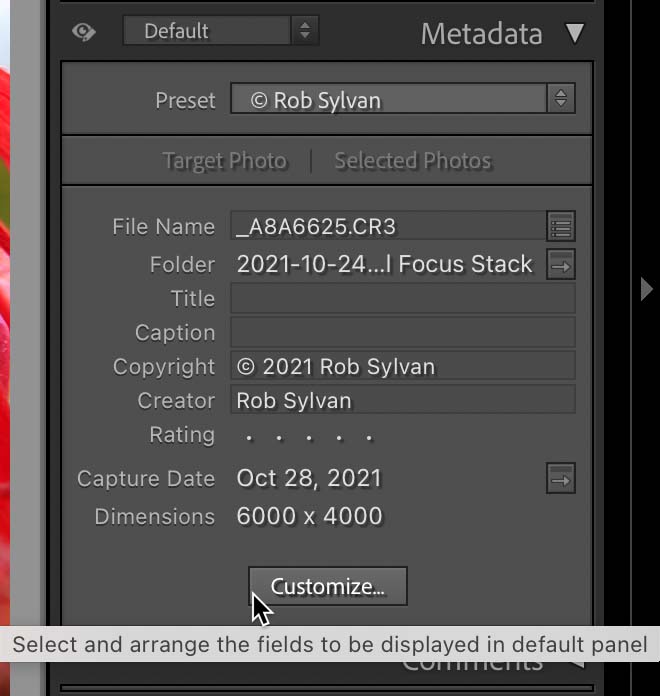
When clicked, it will open the Customize Metadata Default Panel dialog box, which allows you to decide which fields you want to be included in the Default view of the panel. You have the full gamut of available EXIF and IPTC fields, so be sure to scroll down and view them all. Take note of the warning that including a large number of fields can impact performance.
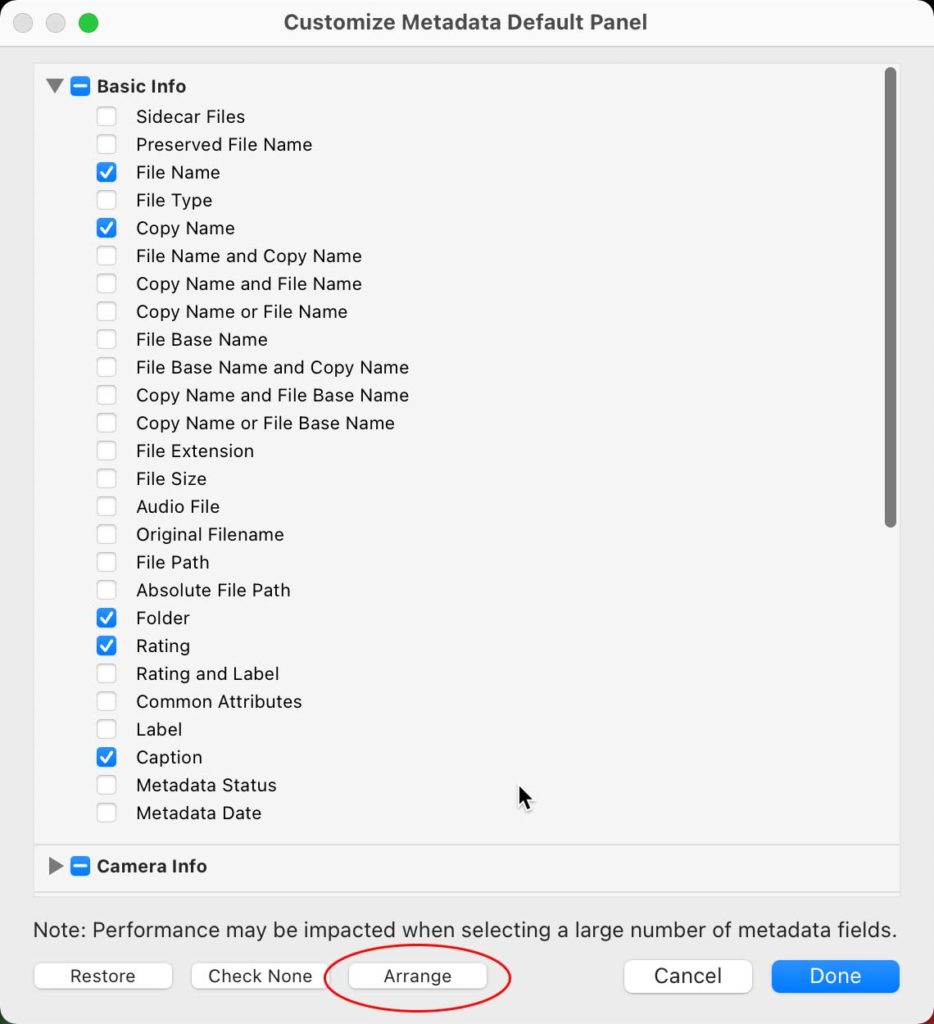
Simply check the box next to any fields you want to see displayed and uncheck the boxes next to fields you do not wish to see in the Default view. At the bottom of the panel is the Arrange button, which provides a specialized dialog box for manually controlling the order the fields display within the panel. If you wish to re-order your chosen fields, first make your selections, then click Arrange.
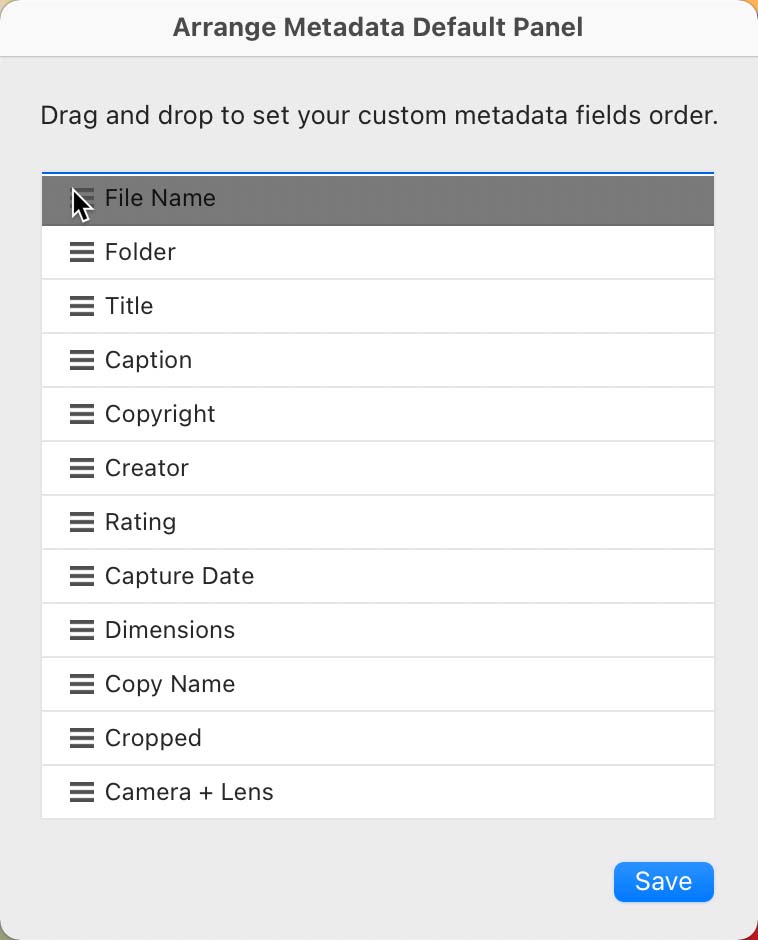
Within the Arrange Metadata Default Panel dialog box you can drag and drop the field names to re-order as you wish. When you click and drag a field name, wait until you see the blue line appear in the desired target location, then drop by releasing the mouse button. When you’re done reorganizing, click Save to save your changes and close the dialog box. You’ll see your choices reflected in the Metadata panel.
Making the Most of the Metadata Panel
While not a new feature, an often-overlooked aspect of the Metadata panel is the fact that many of the fields have associated icons, which are actually clickable buttons relevant to the field. These buttons allow us to quickly jump to specific searches (such as all files at a certain ISO or capture date), the Crop tool, file renaming, viewing the parent folder of the selected photo, and more. To explore this functionality simply hover your cursor over an icon to see its description in a tooltip.
If you’re in a data-entry mode and want to be as efficient as possible, remember that icon in the top-left corner to switch to Edit Only mode to hide all non-editable fields no matter which view you are using at the time. Then, click into the top-most field you want to edit and start typing. For example, if I want to spend time entering titles and captions for a series of photos I would select the first photo in the line, click into the Title field and type out the title. To quickly move to the Caption field below it I can press the Tab key to jump right down and keep typing. If I wanted to revise my title I could press Shift+Tab to jump back up to the Title field again. To keep my insertion point active in the selected field while moving to the next photo in the line I can press CMD (PC: Ctrl) and the left or right arrow key depending on the direction I wanted to go.

To review, pressing Tab will move the insertion point down to the next field, while Shift+Tab goes up. Pressing CMD (PC: Ctrl) and a right or left arrow key moves focus to the next photo in line respectively while keeping the insertion point in the active field. Combined, these little tweaks to the panel plus the keyboard shortcuts allow for much faster data entry.
If you prefer working in Loupe view and want to change the metadata in multiple selected photos simultaneously, enable Auto Sync at the bottom of the right-panel group. You will likely see the Set Metadata on Multiple Photos prompt again, but you can click the Don’t show again box if that impedes your workflow.

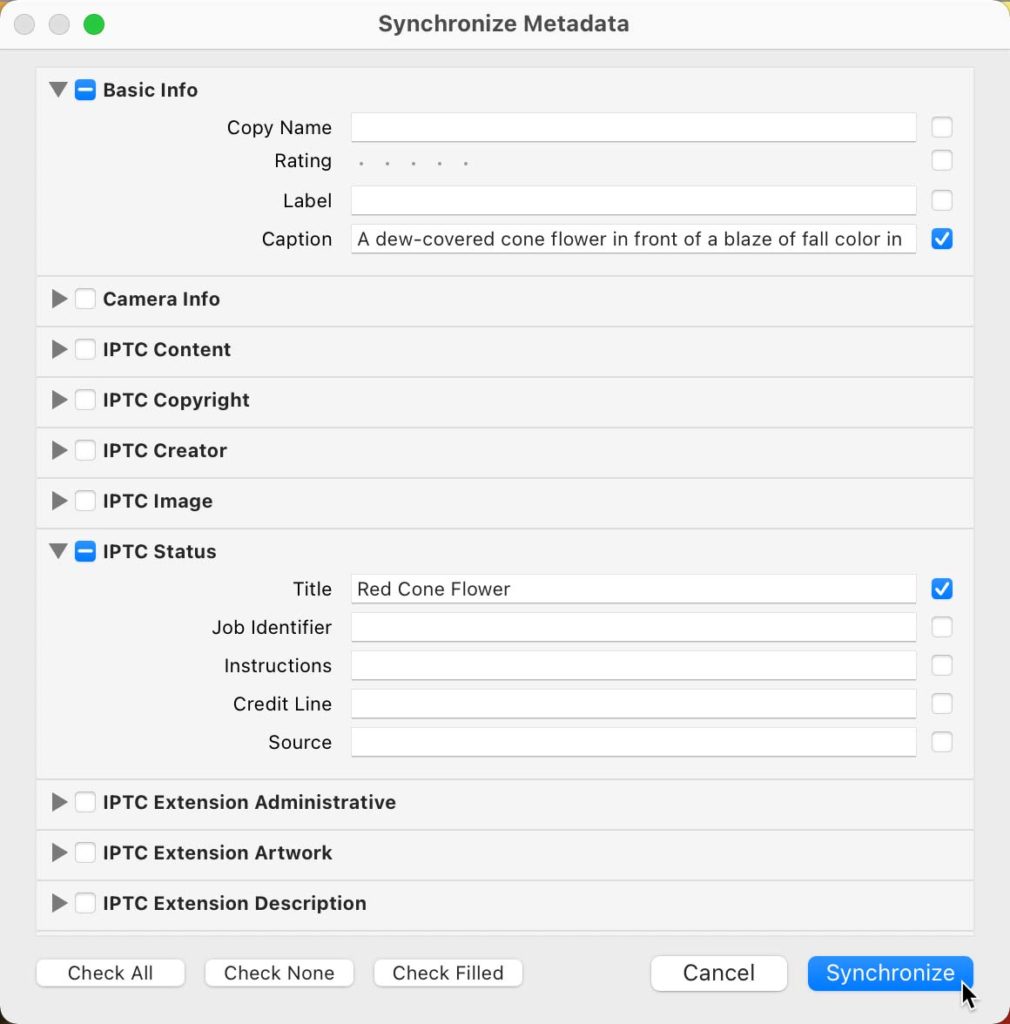
If you’ve already applied certain metadata to a photo and want to sync that same information to other photos, then first select the photo containing the updated metadata, then select the photos you want to sync the information to, and then click the Sync button. This will open the Synchronize Metadata dialog box where you can choose which fields you want to sync across the selected photos. Be sure to only check the boxes next to fields you want to sync across. Checking the box on an empty field (the label will display in red) in the active photo will clear the data in that field on all selected photos, so be careful.
And finally, to really get a jump on metadata entry, be sure to create a metadata preset for all the baseline info, like your copyright and contact info, and keep it updated each year.


