A Cool Little Lightroom Tip (and we announced a new conference today)
PROGRAMMING NOTE: Today we announced “The Portrait Photography Conference” – a new two-day, two-training-track, all online conference November 2-3, 2021 featuring an incredible team of instructors to help you create your best portraits yet. Check out the mini-trailer below:
Details, the full class schedule, instructor list, and tickets are available right here. I’m super psyched, and I hope I see you at the conference!
Now, for a handy little Lightroom tip:
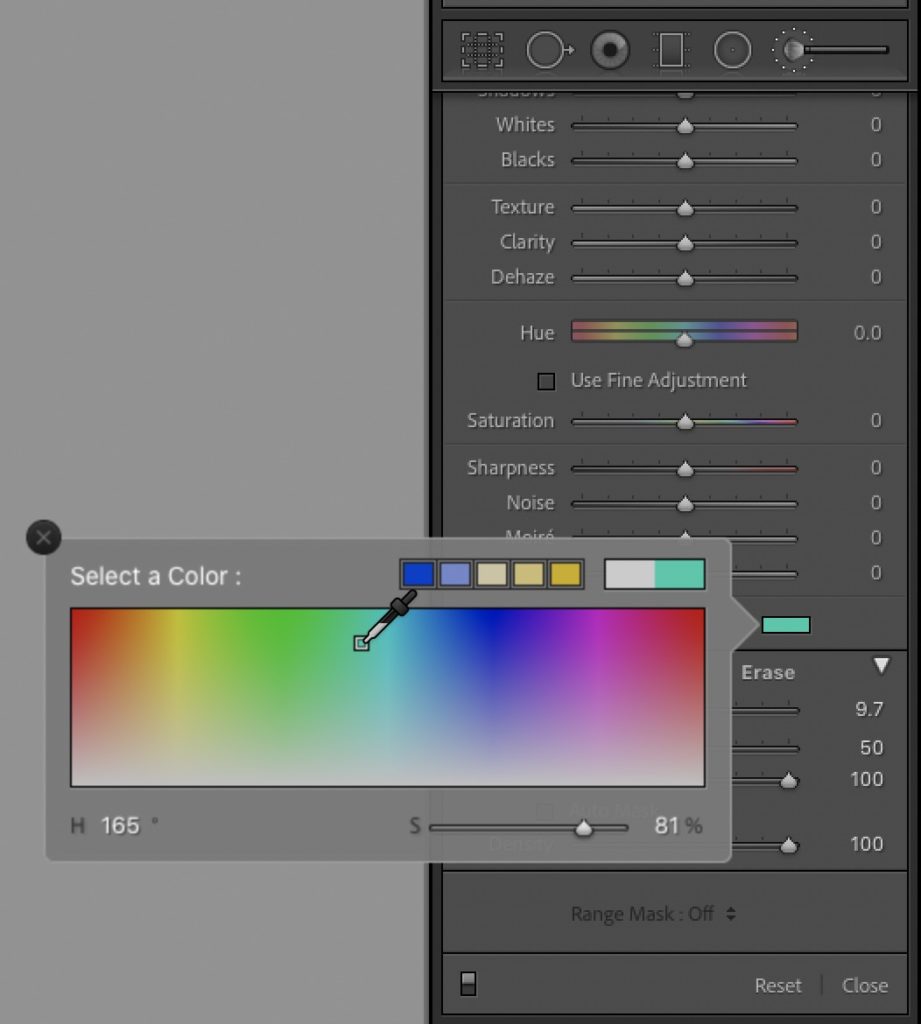
When you’re using the Adjustment Brush, one of the options you have to paint a tint over an area of your image using the Color Picker that appear when you click on the little “X” swatch near the bottom of the Adjustment Brush sliders, as shown here.

The problem happens when you add a tint, and then change your mind. If you click the color swatch again, it just brings up the color picker, and if you’ve chosen a color, there’s no reset button in the color picker. So…how do you reset the color to “None?”
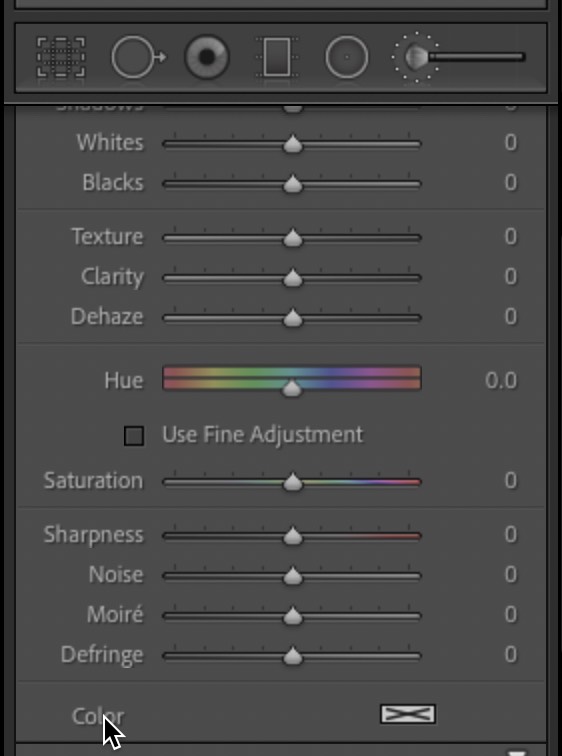
The trick is to not go back to the Color Picker. Instead just double-click directly on the word “Color” to the left of the swatch (as shown below), and it resets the tint color to ‘None.”

That’s it – it’s the little things, right?
Have a great weekend, everybody. #GoBucs! and #RollTide!!!
-Scott


