Extending the Power of Lr Classic Export
Output is such a huge part of Lightroom Classic that it has four separate modules—Book, Slideshow, Print, and Web—entirely devoted to getting photos out in one form or another, then there are a number of publish service options, and finally there is the tried and true Export dialog. The Export dialog is the real unsung hero of Lightroom, and it is probably one of the functions you use the most. As powerful as the Export dialog is, you can expand its capabilities even further, and make your workflow more efficient than it is now. As an example, I want to share one of the ways I’ve upgraded my exports through the use of third-party export plug-ins that I rely on all of the time.
Lightroom Plug-in Manager
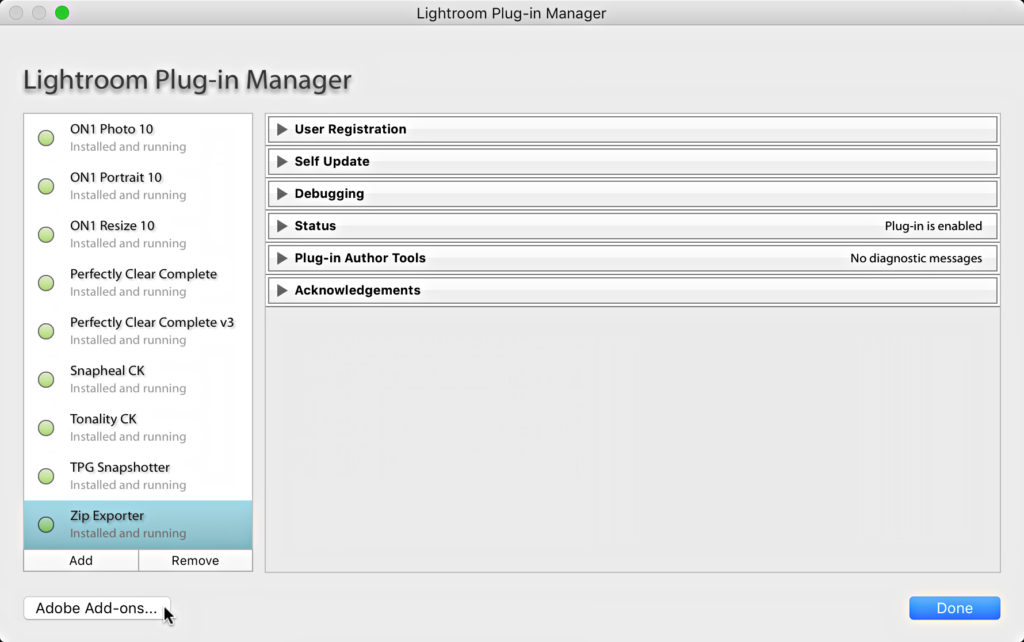
All export plug-ins are installed through the same process and can be managed through the Lightroom Plug-in Manager. Let’s walk through the basics of where you can find these plug-ins, how to install them, how to remove them, and then how you can use one of them. To find the Plug-in Manager go to File > Plug-in Manager.
You should see that you’ve already got a few plug-ins installed that come packaged with Lightroom. At the bottom left of the Plug-in Manager is a button that will take you to the Adobe Add-ons website, where you can try (and buy) many different types of add-ons for Lightroom (and other Adobe products). There are some useful ones there to check out, but my favorite plug-ins can all be found over at the Photographer’s Toolbox. No matter where you get your plug-in, here are the steps for installation:
STEP ONE: Download the file to your computer and unzip to access the plug-in file, which will have an lrplugin file extension.
STEP TWO: Place a copy of that lrplugin file in a folder of your choosing. I store mine in a folder located within my Creative Cloud files, but simply choose a location that makes sense for you.
STEP THREE: Click the Add button on the Plug-in Manager and select the lrplugin file you placed in that folder. Click the Add Plug-in button add it to the manager.
Many plug-ins have a free trial version available (or are just free) and the full version often only requires a donation. After adding the plug-in to the manager you will see if it has any special configuration requirements or a place to add the serial number for the full version. On the left you’ll see a green light next to the plug-in’s name that indicates it is installed and running. That’s all there is to it. To remove a plug-in added in this way just click the Remove button in the Plug-in Manager. Removing from the manager doesn’t delete the lrplugin file from your computer, so you’d need to do that manually outside of Lightroom.
Making Exports Zippy
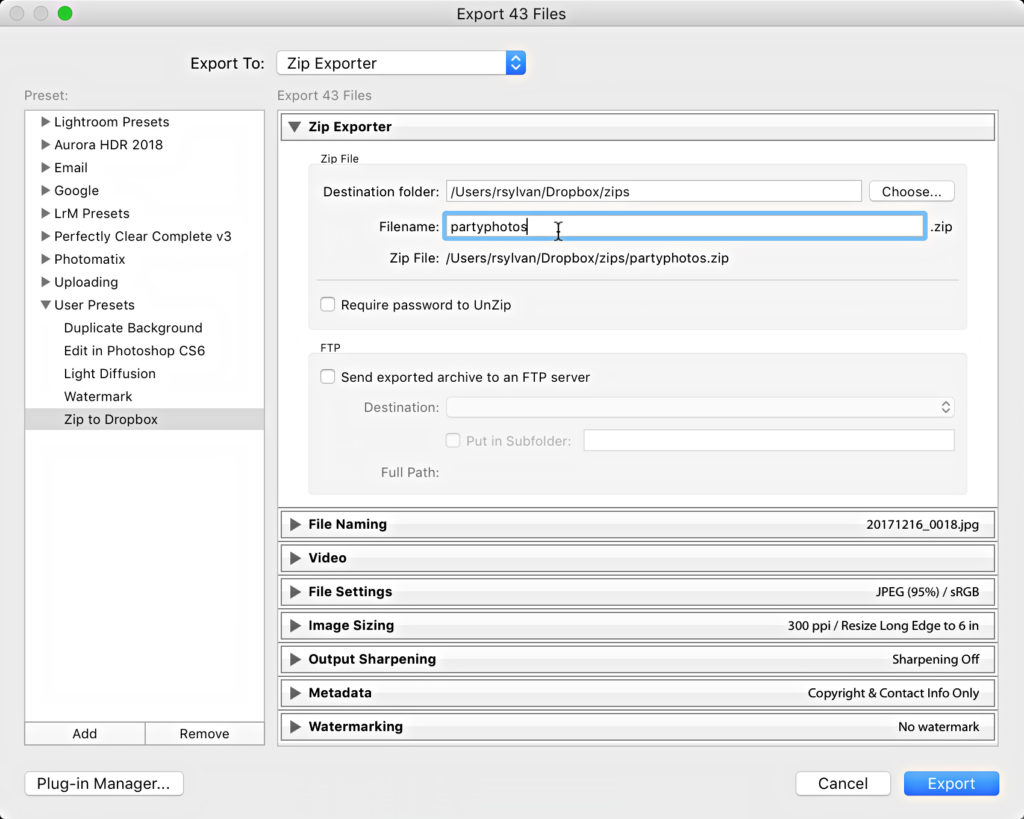
Here’s an example of why I think export plug-ins can be useful. I deliver files in compressed zip format all the time. It is such an easy and universally useable format for sending a files in a neat package that it has become habit for me. There’s a cool plug-in on the Photographer’s Toolbox called Zip Exporter that compresses your exported photos into a zip file right from the Export dialog (includes a free trial mode). You can even (optionally) configure the plug-in to upload that zip file to an FTP server as part of the process. The most common way I use it is to export the zip file to a folder in my Dropbox folder, and then I can easily send a link to that zip file via an email.
Start by selecting the photos, then click the Export button. On the Export dialog, choose Zip Exporter from the Export To drop-down menu to access the panels for this plug-in. The only new panel provided by this plug-in is the one on the top named Zip Exporter, and it is here where you choose the location for this zip file to be created. I chose a folder in my Dropbox folder, but it is entirely up to you. Once you’ve chosen the location all you need to do is enter a name for the zip file itself before configuring the remaining panels based on your export needs for file type, size, color space, etc. like you would for any export. Once configured the way you want it, I highly recommend that you click the Add button under the preset window to save those settings as an Export Preset, which is a huge timesaver for any repetitive type of export you may have.


