Odd Photoshop Bug Affecting (some) Lightroom Classic Users
This is not a typical post for me, but I’ve been getting so many emails from people (only Windows users so far) who are having this problem when sending a photo from Lightroom Classic to the latest version of Photoshop (20.0.1) that I need to share the situation in case it helps others (I added a bonus tip at the end for both Win and Mac users just in case it is also helpful).
Issue
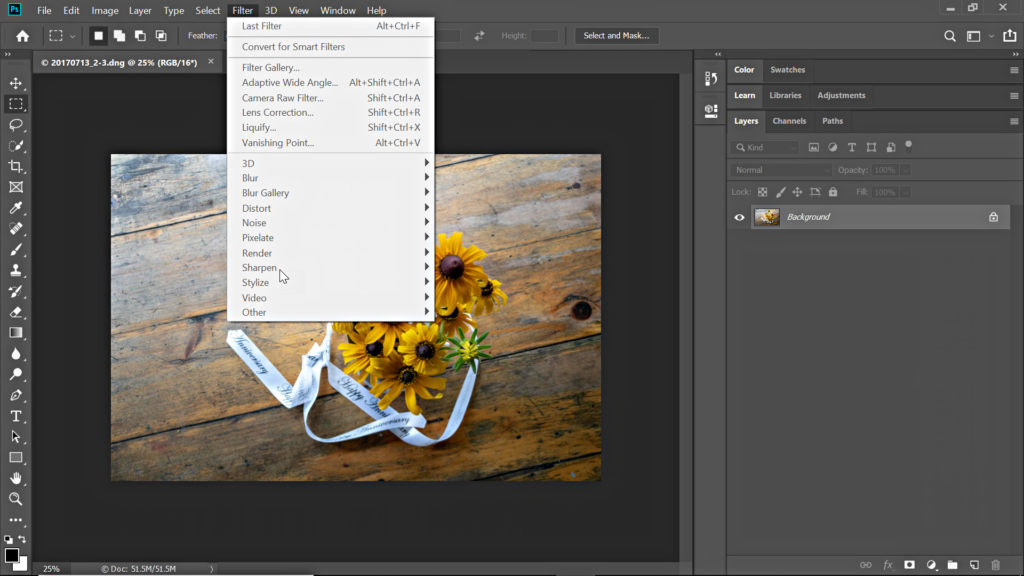
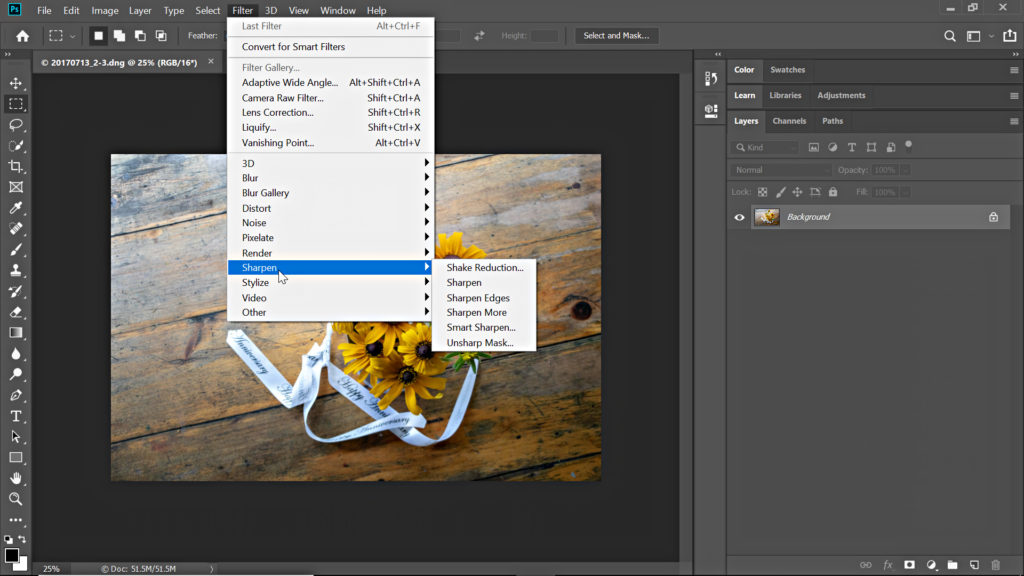
The problem is that people are finding certain actions are missing, notably menu options grayed out (see below) or the Ctrl+J shortcut to duplicate a layer not working, when sending a copy of a raw photo to Photoshop from Classic. I can only replicate this on Windows, and I’ve only heard from Windows users with this issue, so I think it is safe to say this is Windows only. If you’ve experienced this issue, head over to the Photoshop Family forum, and add a “like” to this post on the issue to be notified when an update is available.

Workaround
The current workaround is to:
- Close Lightroom Classic and Photoshop.
- Re-open Photoshop.
- Re-open Lightroom Classic.
Basically, if you just open Photoshop first you will avoid the problem.

Alternative Workaround
[Update] You can also open Photoshop’s preferences to the General tab, and check Disable the Home Screen.
Bonus Tip and Additional Alternative Workaround
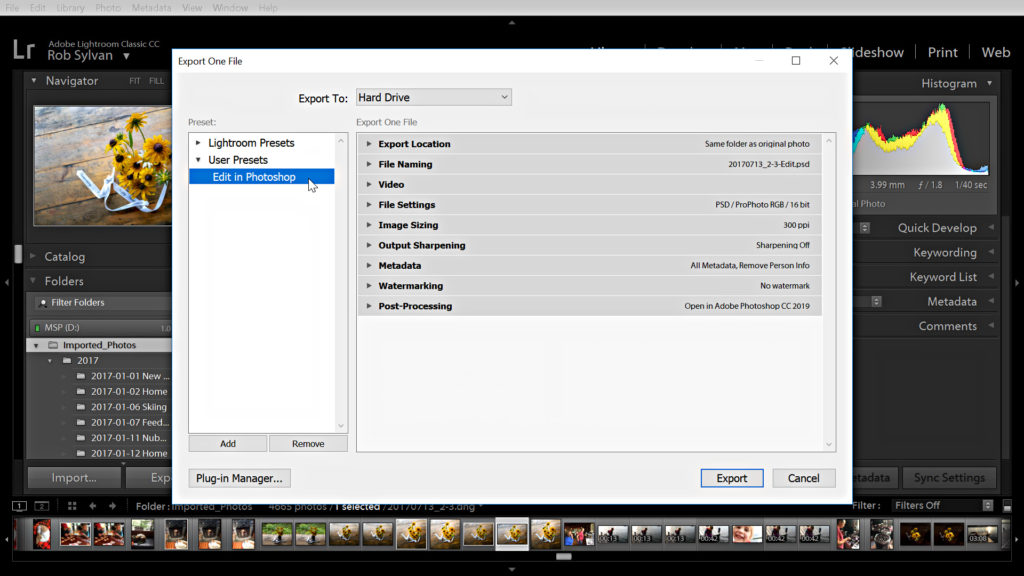
Well, if you read this far I’d like to leave you with another tip that can actually function as a workaround for this issue, but really it just gives you another route to send a copy to Photoshop for editing and works for both Win and Mac. Did you know that you can create an Export preset that sends a copy to Photoshop, saves the copy to the same folder as the source photo, adds the copy to the catalog, and even stacks the copy with the original? You can! Sure at face value it simply mimics the Photo > Edit in Photoshop command, but because you are using the Export dialog you can choose JPG instead of PSD/TIF, you can resize the copy, and all the other things you can configure on Export. Granted, this is not something I use much myself, but I think it is handy to file away for just that time it might be helpful. I think the reason this may work around the problem is that it saves the copy to disk before opening in Photoshop, but that’s just a guess.
To create the Export preset:
- Select any photo in Library and click Export.
- On the Export dialog, expand the Export Location panel and set Export to same folder as original.
- Check the boxes for Add to this catalog and Add to stack.
- Choose a file naming convention for the copy (such as, Filename-Edit).
- Configure File Settings as desired for file type, bit depth (if applicable), and color space.
- Configure Image Sizing as desired (most likely, uncheck resize to fit and enter desired resolution).
- Expand Post-Processing panel and set to Open in Adobe Photoshop as the After Export step (this is the key).
- Click the Add button to save settings as preset (and give it a meaningful name).

Now you can press CMD/Ctrl+Shift+E to open the Export dialog and select your preset, or if that was the last export you did previously, you can just press CMD/Ctrl+Shift+Option/Alt+E to trigger Export with previous and skip the Export dialog. Eventually that bug will get squashed, but you can use this bonus tip forever!


