Transferring Presets From the Lightroom Cloud
There’s a cool component of the Lightroom cloud family of apps that doesn’t exist in Lightroom Classic, which are called the Learn and Discover. The goal of both of those components is to help us learn how to use the editing tools, as well as providing inspiration for what is possible. They can be found in each of the Lightroom apps (I’m using the Lightroom app for Mac here), and even in Lightroom on the web (lightroom.adobe.com and log in with your Adobe ID).
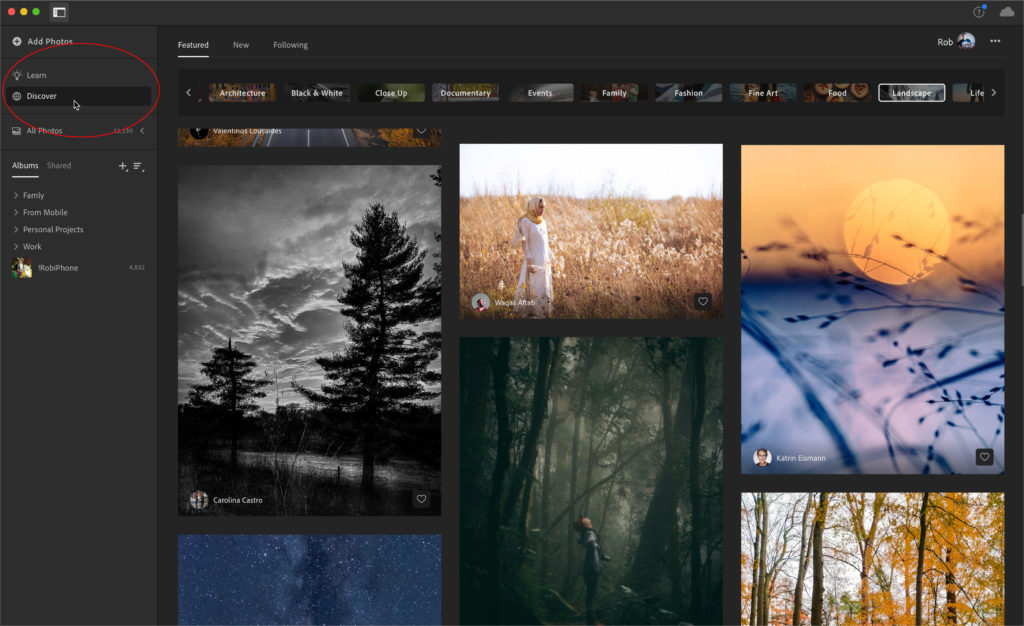
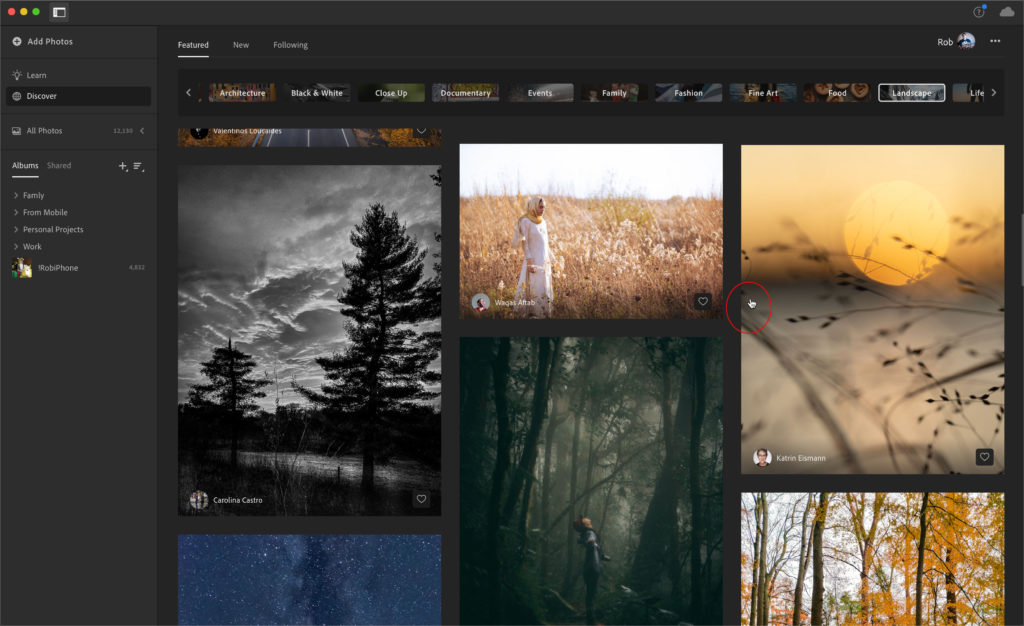
Within the Discover section you can find tutorials created and submitted by fellow Lightroom users all around the world. They are grouped under various themes, like Landscape, Food, Black and White, and so on. As you scroll through the tutorials, you can hover your cursor over them to see a quick before and after to help you decide if you want to look further.
Clicking on a tutorial takes you into seeing the image as it automatically cycles through each step in the editing process created by the person who submitted the tutorial. That’s pretty cool.
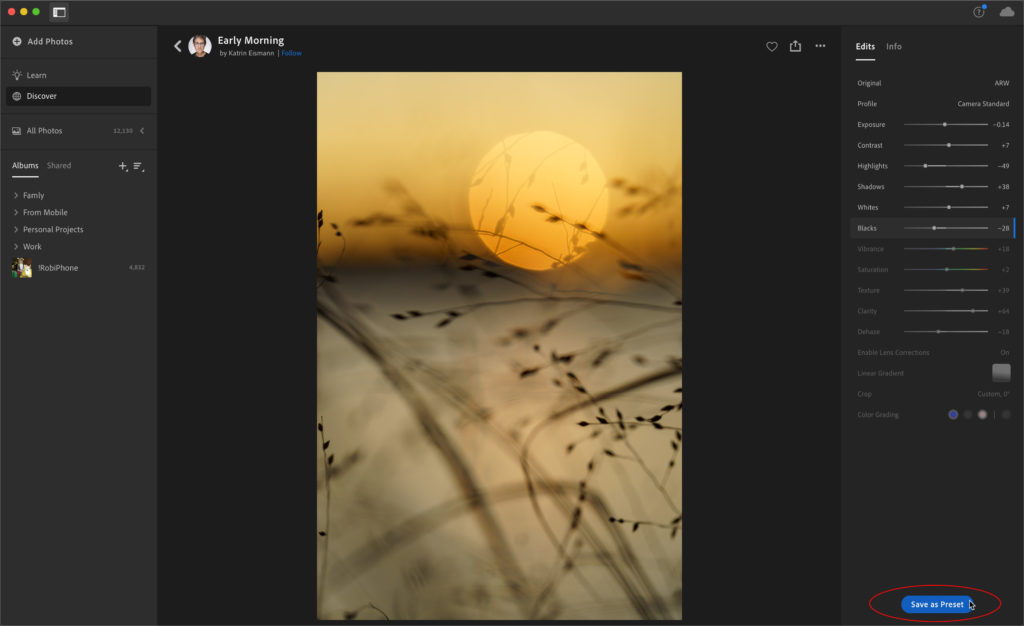
Many of these tutorials (possibly most of them) also allow the settings used in that edit to be saved by you as a preset, which is added to your collection of presets and synced across all Lightroom devices. Just look for the Save as Preset button, click it, and save it to your presets.
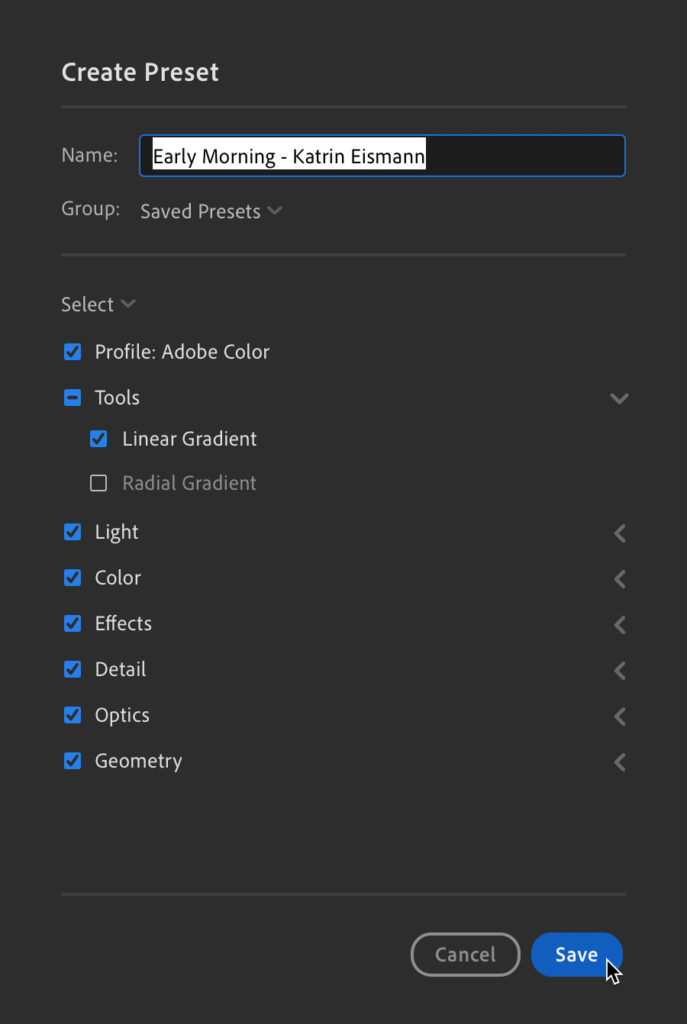
Unfortunately, presets created or acquired in the Lightroom cloud apps are not synced to Lightroom Classic. Here’s how to manually share those with Lightroom Classic:
Step One: Go through the Discover section and save as many presets as you wish, or just create your own presets with your own photos.
Step Two: Now that you have some unique presets in Lightroom, again this should be done from the Mac or Windows Lightroom app (not the mobile apps), press E to open the Edit panels, then click the Presets button (bottom) to open the Presets panel.
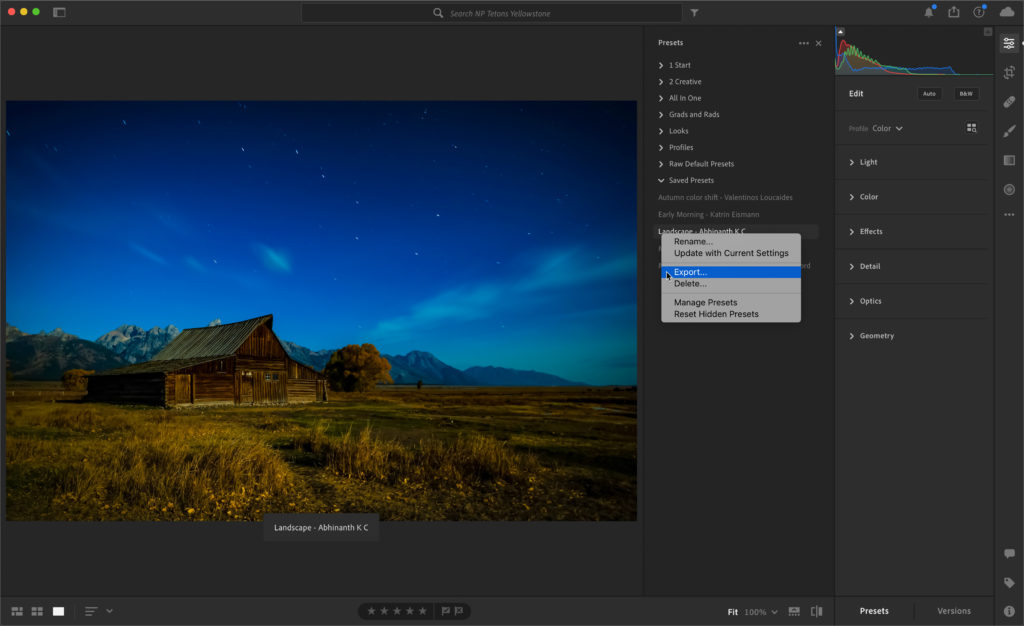
Step Three: Right-click each preset that you want to bring into Lightroom Classic and choose Export. This will save out the preset as an .XMP file. Choose where you want to save it (like your desktop) so that it is easy to find. Repeat that process for each preset you want to export.
Step Four: Switch to Lightroom Classic, and go to the Develop module.
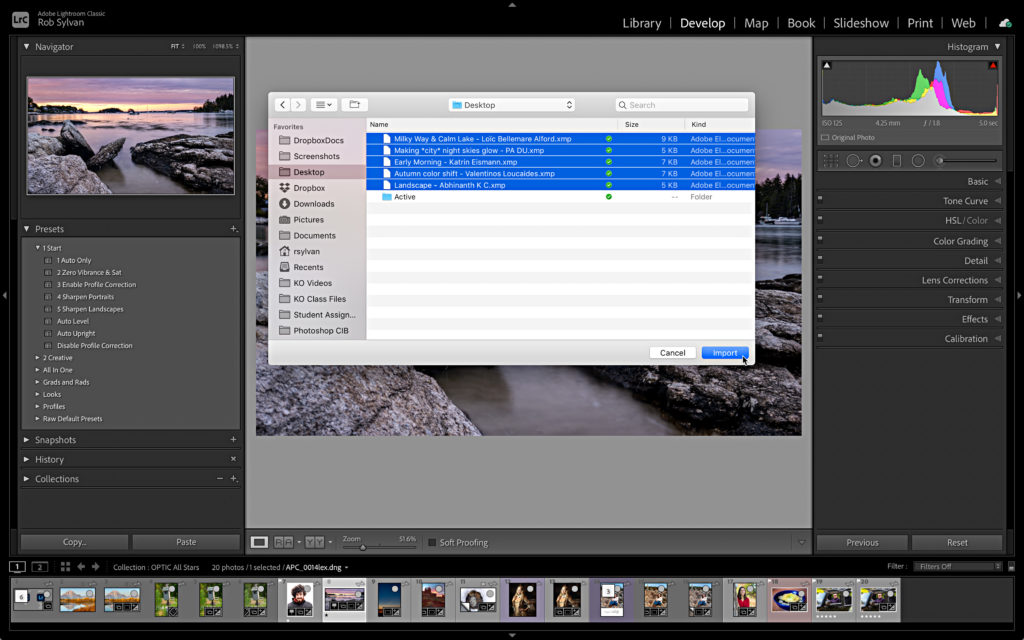
Step Five: Go to File > Import Develop Profiles and Presets, then in the dialog that appears, navigate to where you saved the exported presets. Select them all, and press Import.
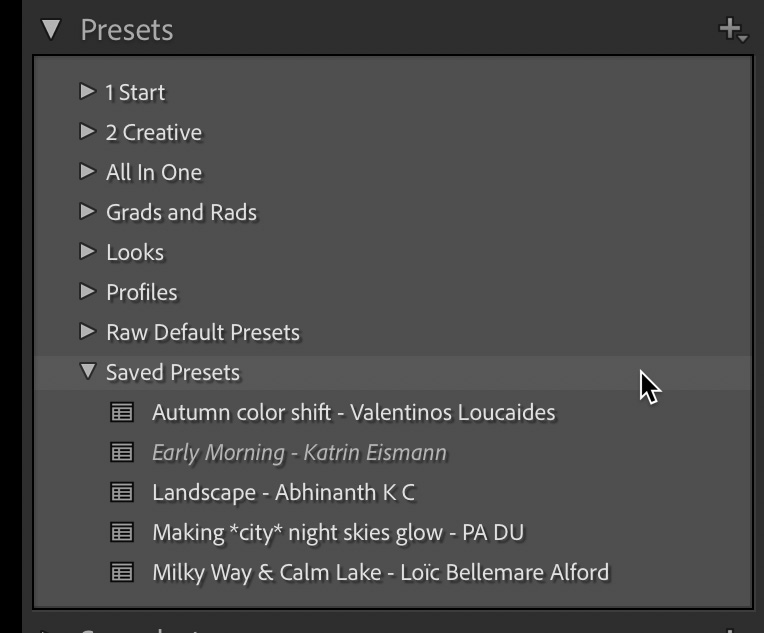
The selected presets I exported were originally saved in a preset group named Saved Presets in the Lightroom cloud app. After importing into Lightroom Classic, a new preset group named Saved Presets appeared in the Presets panel, and the imported presets were found within. This may vary based on how your presets are grouped (organized). You can use Lightroom Classic to move them to other preset groups as you wish.
You can also read my previous tutorial on getting your Lightroom Classic presets into the cloud. Hope you find that helpful!


