Nik Color Efex Pro 4 to MacPhun Luminar ‘Decoder Chart’
Happy Monday everybody! With the Nik Collection already dying for some users out there (here’s the link to my article) and Google publicly announcing that they are no longer supporting the Collection or updating it, I mentioned that I was recording a new online class for KelbyOne on MacPhun’s new Luminar plug-in for Lightroom and Photoshop. It’s available for Mac now, but they have announced that a Windows PC version is coming soon — you can sign up to test the PC beta version here).
While Luminar it doesn’t replace everything the Nik Collection does, it does a pretty awesome job of covering the special effects plug-in I used the most by far — Nik Color Efex Pro 4. That is one awesome plug-in, and I hate to see it die on the vine like this, but at least we have a viable alternative, and one that’s pretty cheap (It’s $69, and if you’re a KelbyOne member you get 15% off of that).
Anyway, I recorded the class last week and in the class, I included a Color Efex 4 Pro to Luminar “decoder” and I thought I’d share that with you folks here in case you find it helpful (btw: my class should be out at the end of this month).
Here are the effects in Nik Color Efex I used the most (my personal favorites), and the filter that gets similar (sometimes better, sometimes not), looks in Luminar:
> Nik’s Bi-Color Filters = Luminar’s Bi-Color Toning
> Nik’s Bleach Bypass = Luminar’s Dramatic
> Nik’s Brilliance / Warmth = Luminar’s Split Color Warmth
> Nik’s Cross Processing = Luminar’s Cross Processing
> Nik’s Darken / Lighten Center = Luminar’s Vignette with “set center” point
> Nik’s Detail Extractor = Luminar’s Details Enhancer
> Nik’s Glamour Glow = Luminar’s Soft Focus
> Nik’s High Key = Luminar’s High Key
> Nik’s Polarization = Luminar’s Polarizer
> Nik’s Remove Color Cast = Luminar’s Remove Color Cast
> Nik’s Skylight Filter = Luminar’s Golden Hour
> Nik’s Tonal Contrast = Luminar’s Structure

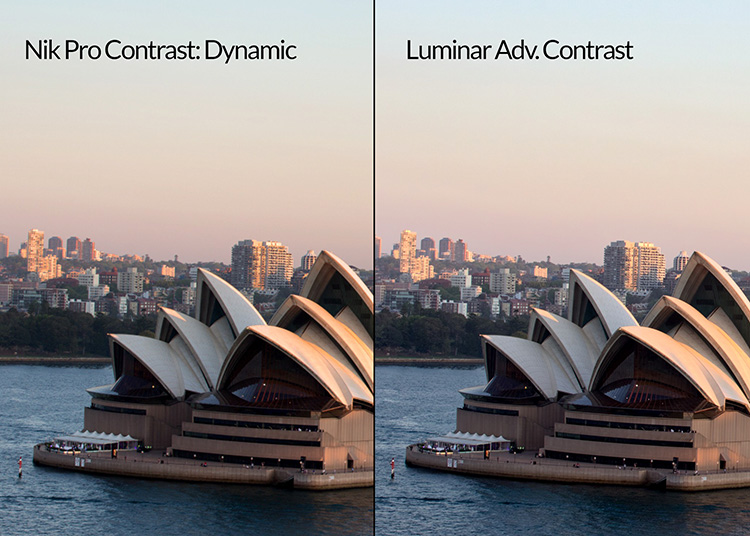
> Nik’s Pro Contrast = Luminar’s Advanced Contrast + Structure (you need to add some of Luminar’s Structure filter to get it looking more like the presets from Nik’s Pro Contrast; in particular their ‘Auto Enhance,’ ‘Dynamic Contrast,’ and ‘Strong Contrast’ presets. I cover these settings in the class so you can create your own presets that look very much like Nik’s Pro Contrast presets.
Those were my “bread and butter” filters so to speak (Mmmmm. Bread. Mmmm. Butter), so it’s helpful (well, to at least to me) to know which Luminar settings I can use in their place. Hope you found it helpful, too. I’ll let you guys know when the class goes live (it’ll be a few weeks yet).
Hope this week is a really fun, productive, and awesome one for you!
Best,
-Scott
P.S. My brother Jeff treated the wifey and me to go see Ann Wilson of Heart in concert on Saturday at the intimate Capital Theater – really great show! With the way she belted out those songs, and classic Heart hits, it’s hard to believe she’s 66 years-old. What a voice! 🙂


