It’s been about five years since we covered this gray card technique here on the blog, so…I think we’re a bit overdue, especialy since this is a technique I use so often in my own workflow to get my white balance right on the money.
Using a Gray Card
A ‘gray card’ is just what it sounds like — a card that’s 18% gray that we use to help us set a really accurate white balance. These cards are so handy that I include a perforated tear-out gray card in my”Lightroom Book for Digital Photographers” (so if you have my book, turn to the last page and tear your gray card out). If you don’t have my book, you can pick up a gray card from B&H (here’s a 12″ collapsable one I like by Impact for around $29).
Anyway, here’s how you use it with Lightroom.
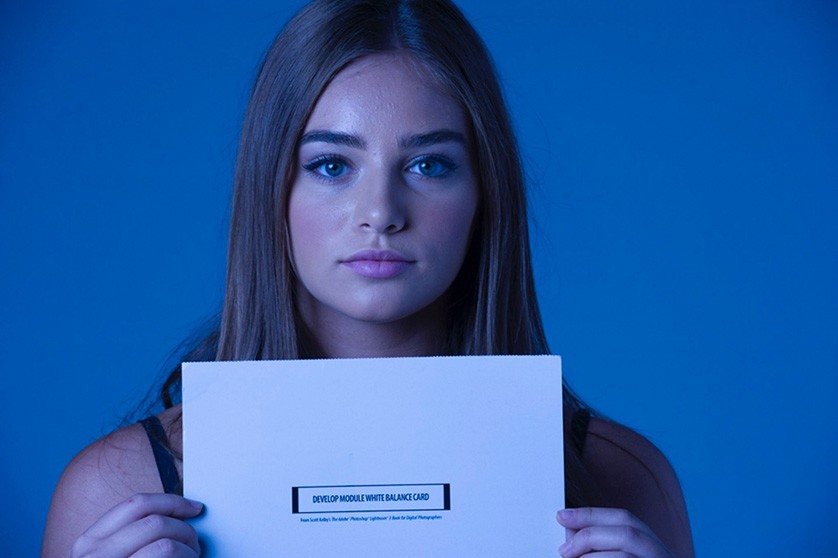
Once you get your lighting set, you’ll need to take one photo with the gray card clearly visible in the scene. In this case, we’re doing a portrait shoot so hand your subject the gray card and ask them to hold it so its in clear view (I usually have them hold it up near their face, like you see above). The card she’s holding here is the tear-our card from my Lightroom book. Once she’s holding the card, just take one shot (that’s all it takes).
Import the images into Lightroom
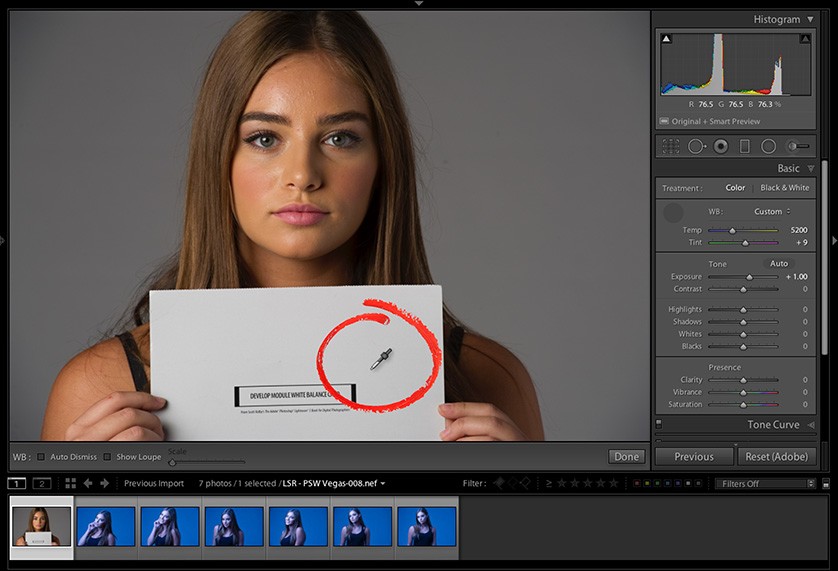
Import all the shots from the shoot into Lightroom. Get the White Balance Eyedropper tool (from up in the toolbar along the top left — it’s the one that looks like an eyedropper 1/2-filled with gray), and click it once directly on the gray card shot (the first shot you imported) and BAM! That’s it! Your white balance is set for this shot (as seen above).
Applying this white balance to other images
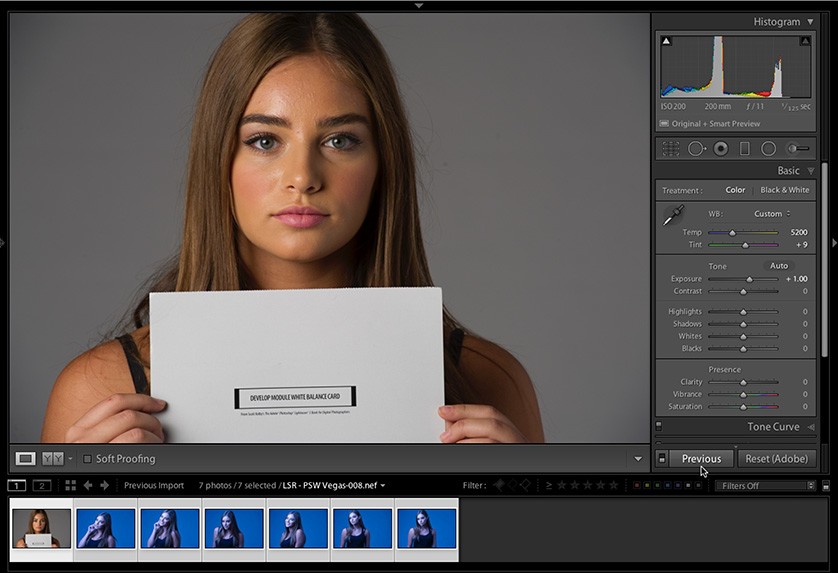
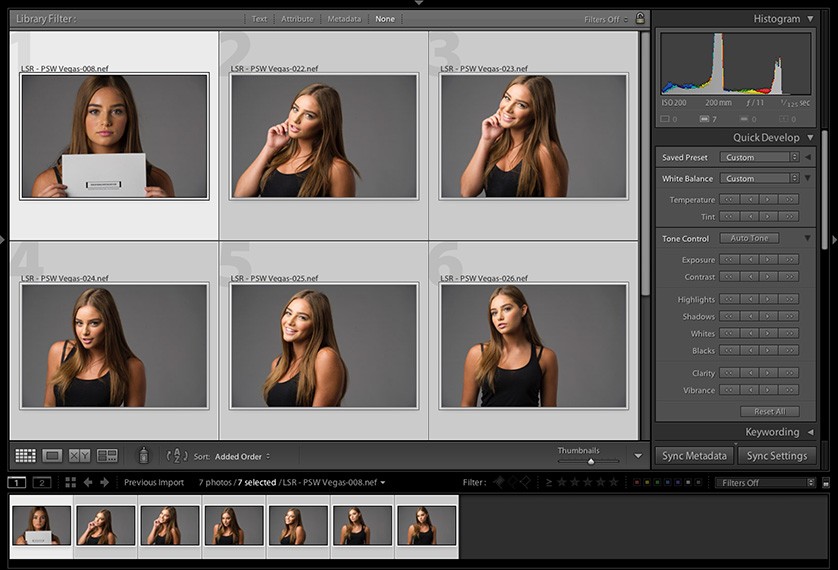
Now hold the Command-key (on Mac) or the Ctrl-key (on Windows) and click on any images in that filmstrip that you want to have exactly same white balance settings (the same one as the gray card image you just corrected), as seen above.
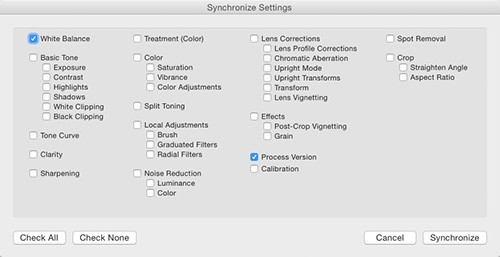
Now click the Sync button at the bottom of the right side panels. This brings up the dialog you see above left. This lets you synchronize all the changes you’ve made to the image with the gray card, with those other images you just selected, but since in this case we only adjusted the White Balance, click the “Check None” button (on the bottom left), and then turn on the checkbox for White Balance (and I always leave Process Version turned on so I’m using the most current math behind the images).
Just One More Click and You’re Done
Now just click the Synchronize button and it instantly applies the same gray card white balance setting to all your other selected images, as seen above (I pressed “g” to switch to the Grid view so you can see how the new white balance was applied).
There’s an even quicker way
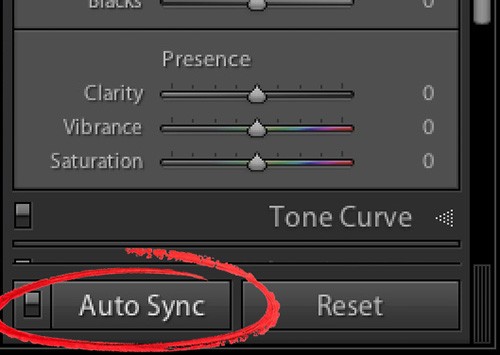
If you know right up front that you want to change the white balance for all the images in your shoot to match the one where you subject is holding the gray card, then your workflow is slightly different (and much faster). Step one is to Select all your images, then turn on Auto Sync (it appears where the Sync button used to be at the bottom of the right side panels.
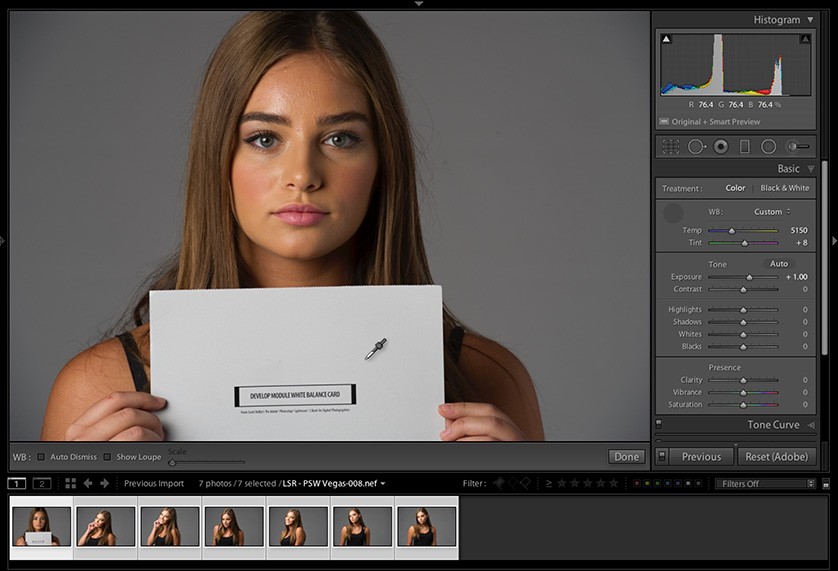
Step two is to click on the photo with the gray card it in; click the White Balance eyedropper on the gray card itself, and voilá — all the selected images are immediately changed to that white balance.
Well, there ya have it. Hope you found that helpful. 🙂
-Scott

